· 3 min read
Liam Martens

Introduction

Recently, we introduced the option to animate component properties. You may be confused as to why this can be useful, since switching between properties and variants happens immediately without any transition. Well, there is one big use case for this: Sprite animations!

In this guide we will create a short looping sprite aninmation using the component variants.

Setting up the components

For this tutorial, we will be using the walking sprite sheet from the following ADA Fruit Tutorial.

Sprite Sheet

We'll start by downloading the image and placing it in Figma.

Start

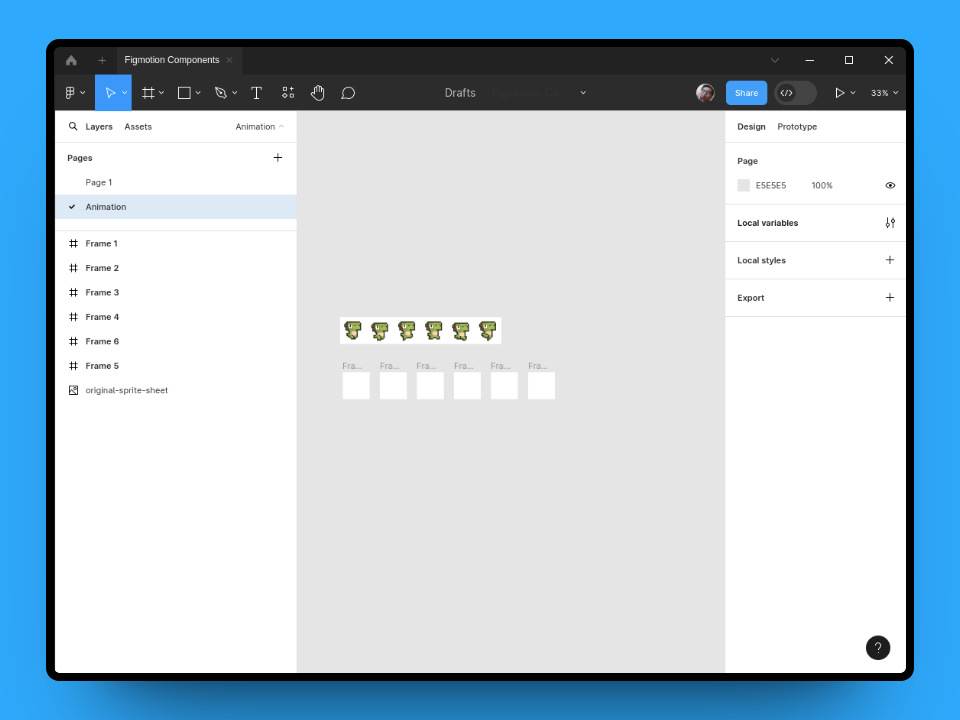
We can see the sheet is 640px wide, 107px high and contains 6 states. We can divide the width by the 6 states (106.67px each) and create 6 frames for each state with those dimensions (106.67px * 106px)

Frames

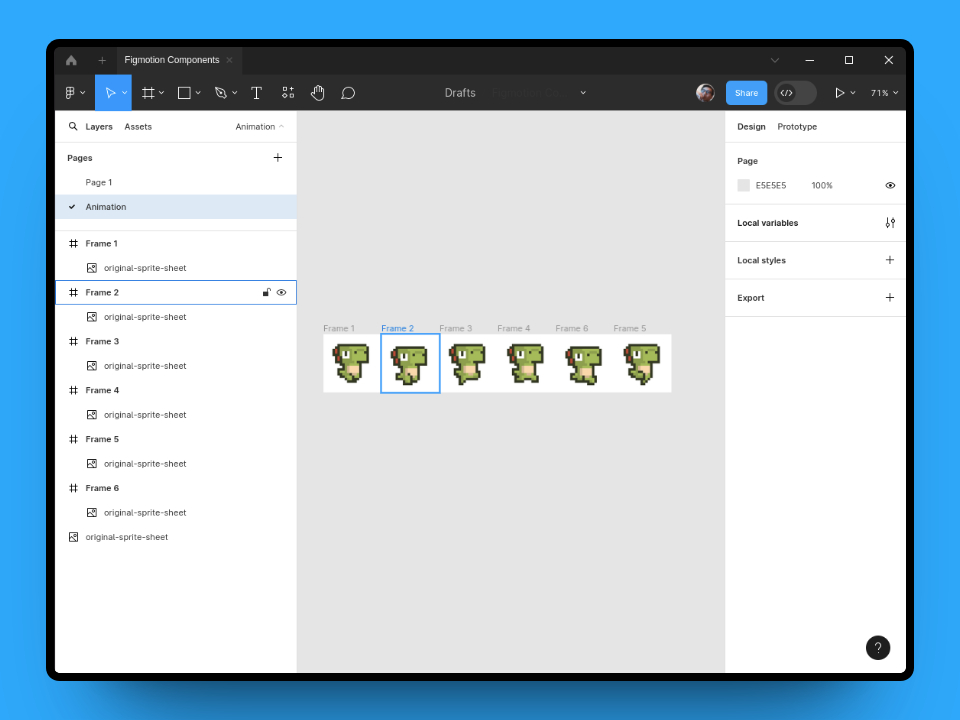
To easily fit each character into each frame we will simply overlay all the frames over the original sheet, edge-to-edge. Doing this we can simply copy the original sprite sheet into each frame and Figma will keep the original position of the image - automatically placing each character correctly inside each frame.

Copy images

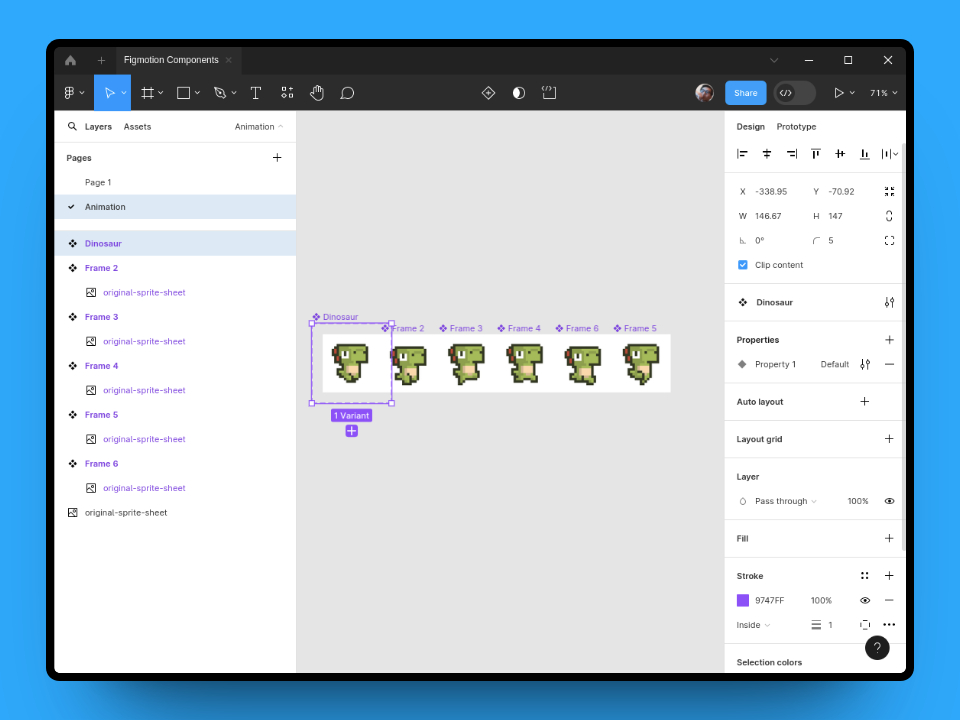
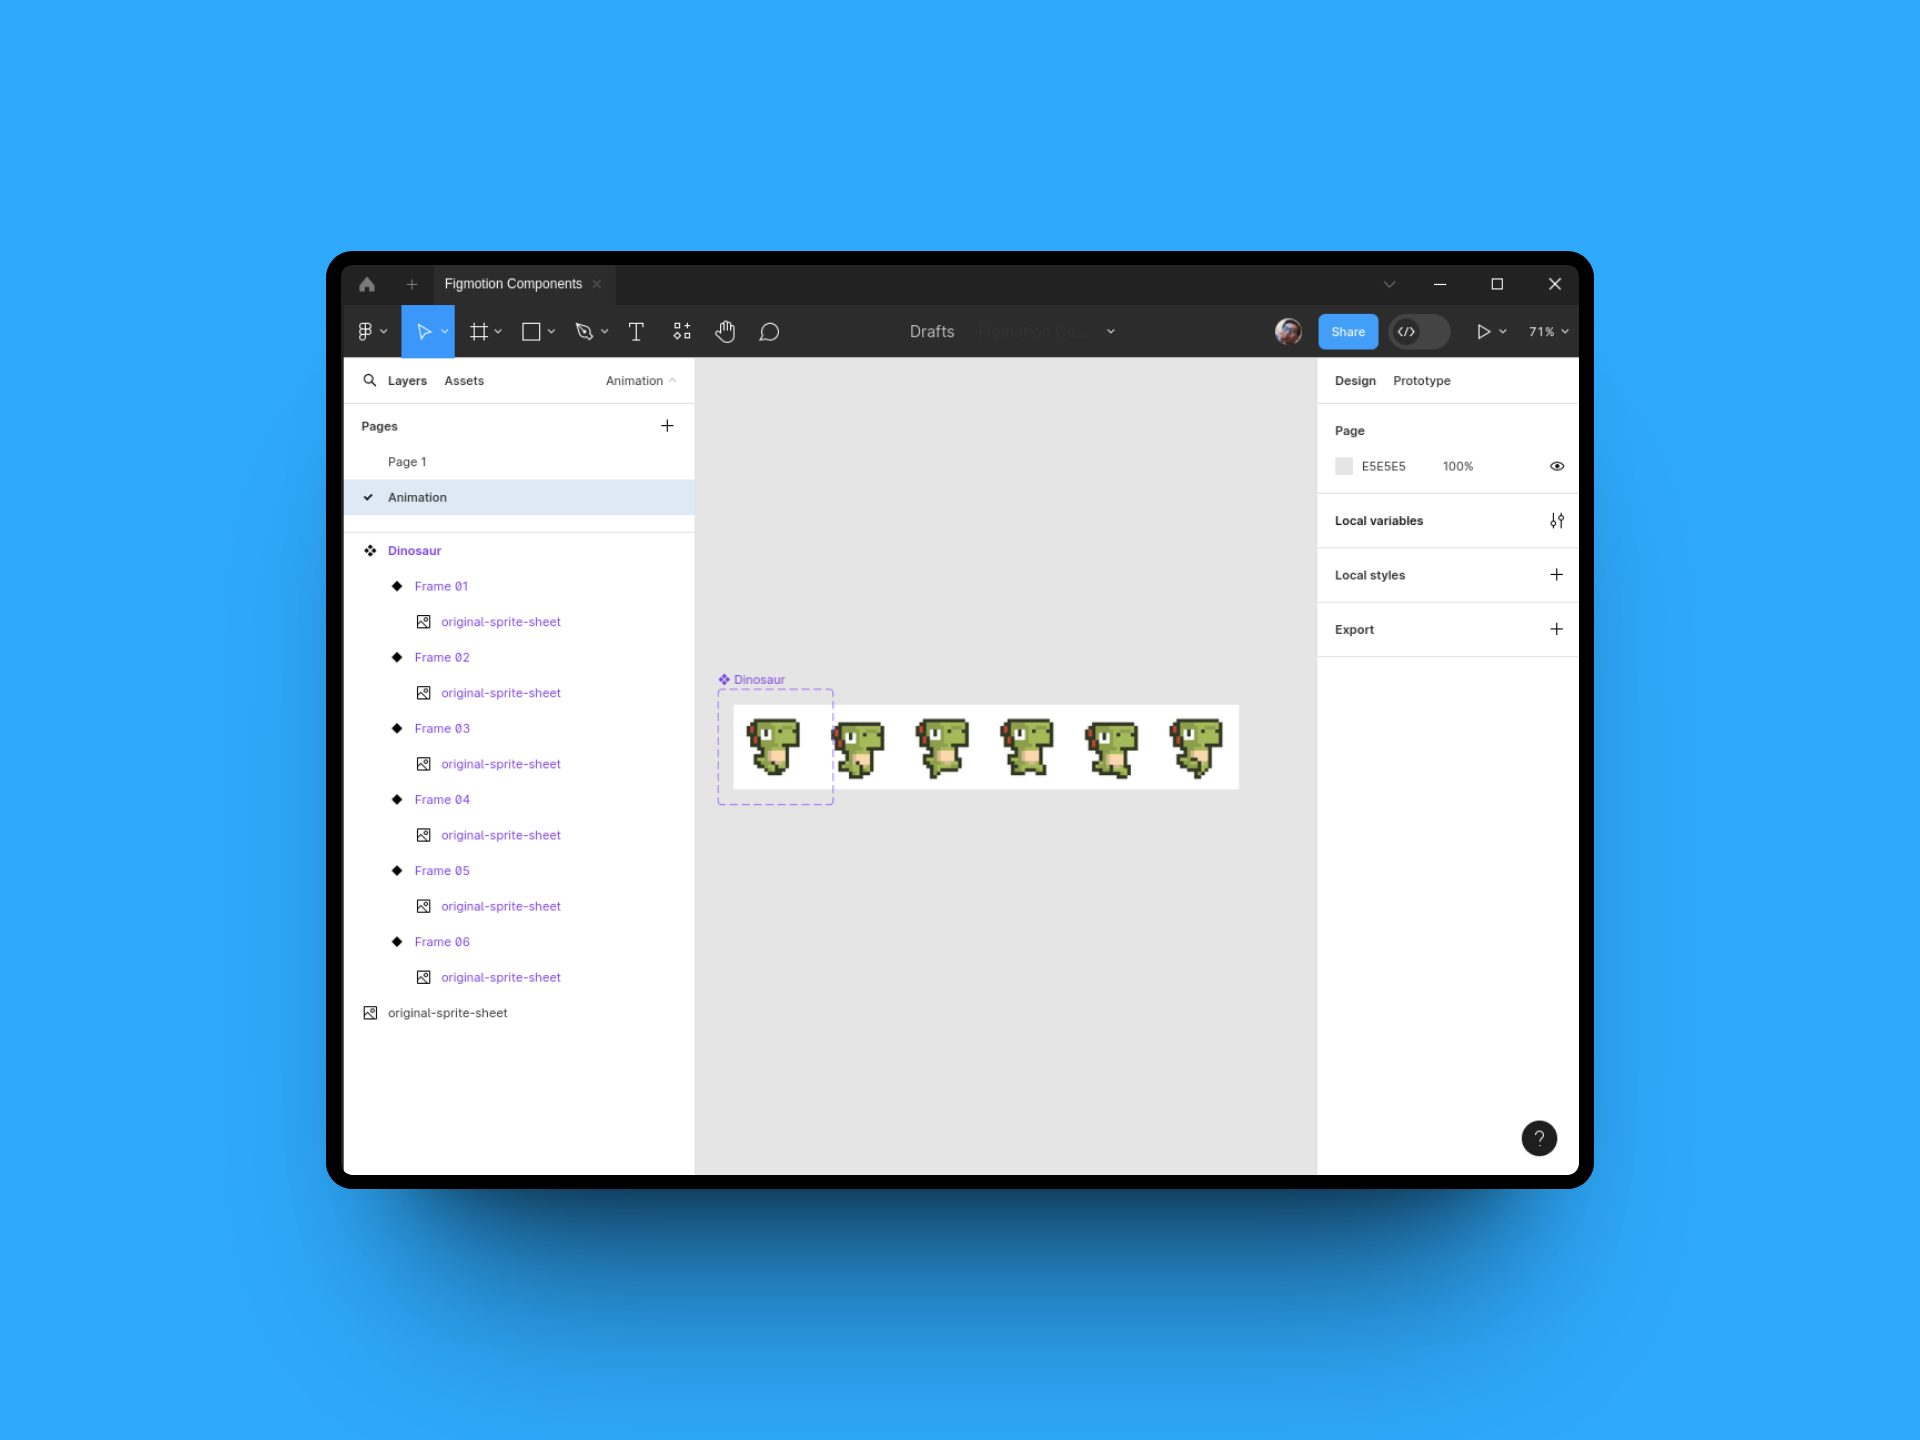
Next, we can turn each frame into it's own component and we will rename the resulting Frame 1 component to Dinosaur. We will also use the component properties section to add a Variant to our Dinosaur component.

Dinosaur!

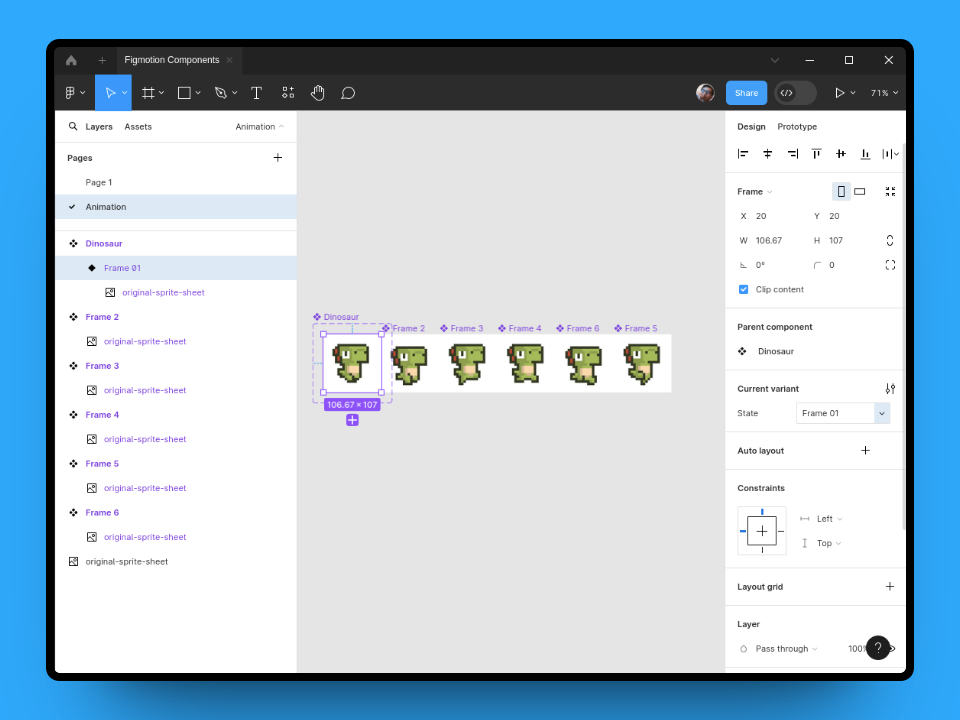
We now have our component with a property called Property 1 and a default state. For clarity we will name the property State and set it's value to Frame 01

Rename property

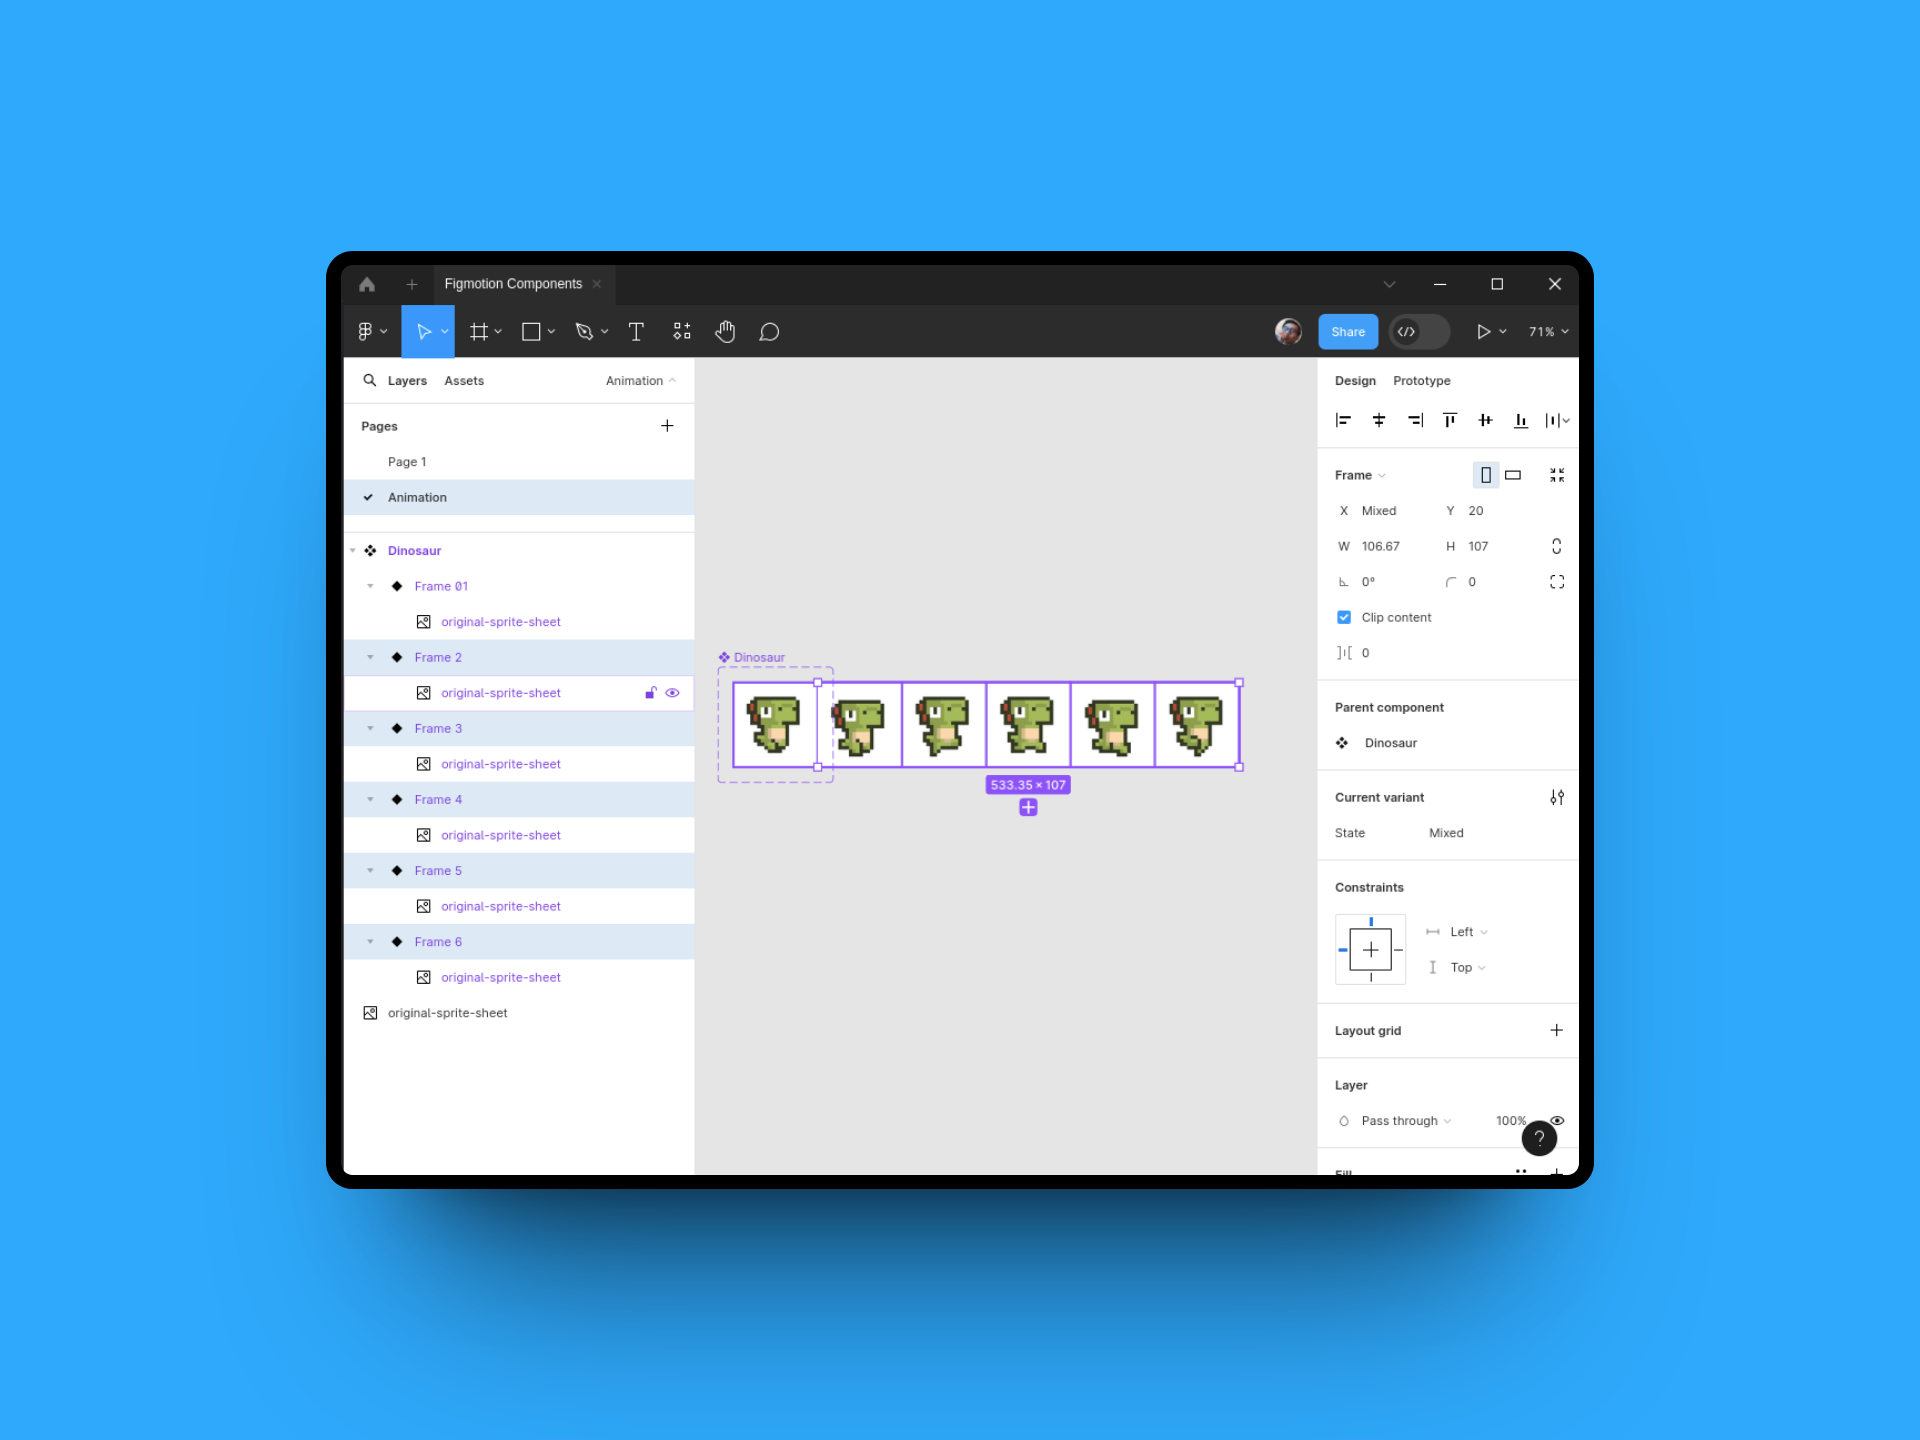
Next, we can select all the other components we just created and place them inside our Dinosaur component. Figma will automatically turn each component into a variant.

Rename property

Lastly, we will update each variant's State property to reflect our original formatting of Frame 0x. This means we will have Frame 02, Frame 03, etc...

Rename property

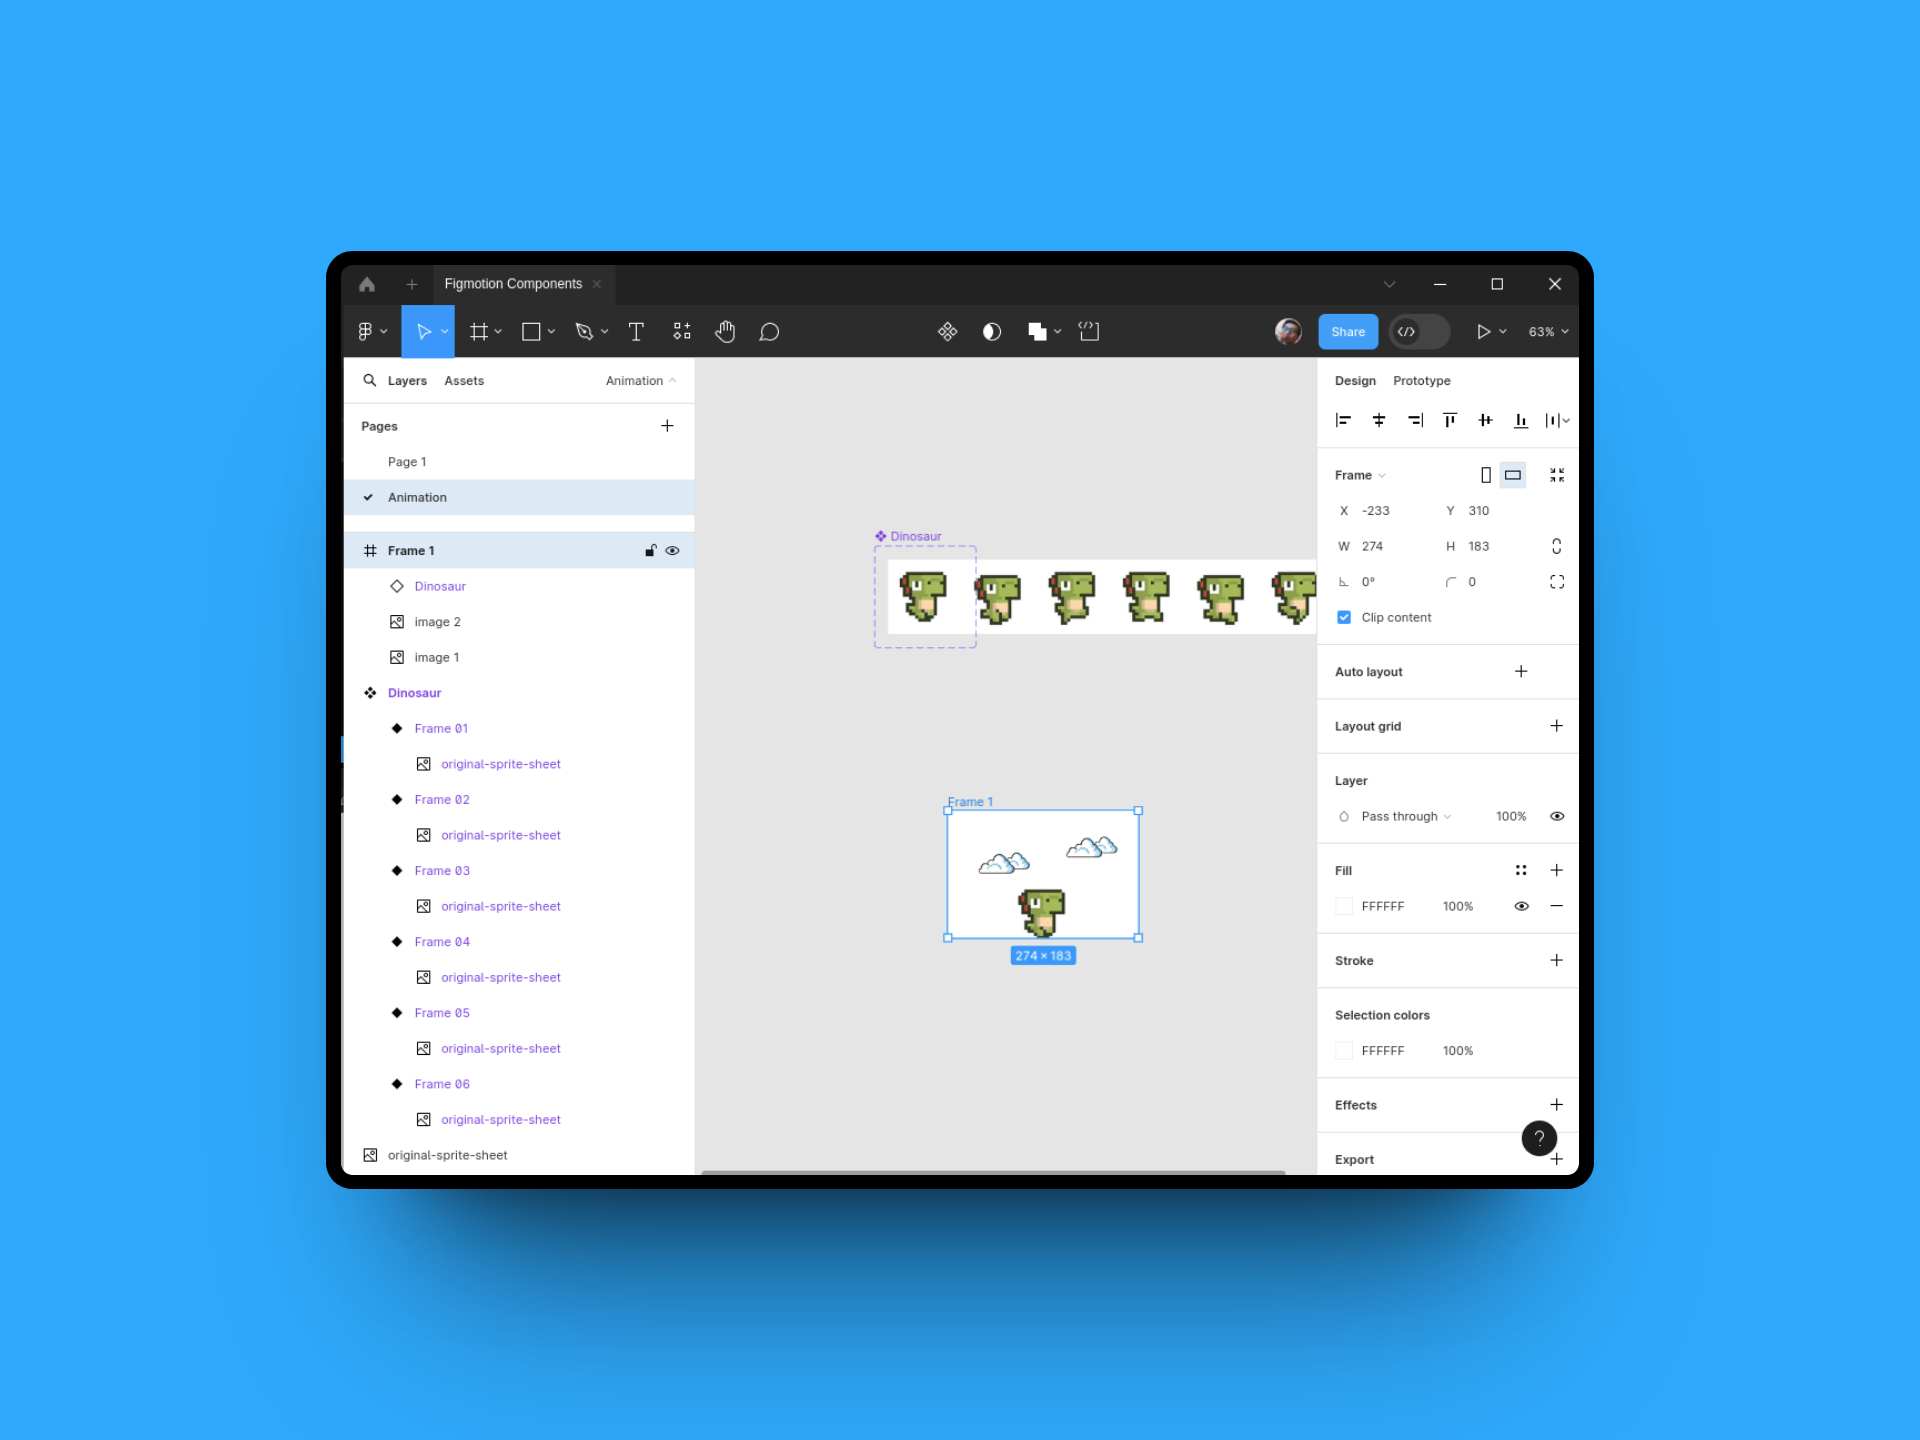
With all our components created, we can create a small Frame which we will place an instance of our Dinosaur component in. (I also went ahead and added some clouds, of course that's optional)

Animation frame

Creating the animation

That's all for Figma, now we can open Figmotion. Go ahead and select your newly created Frame and select Figmotion from your plugins list.

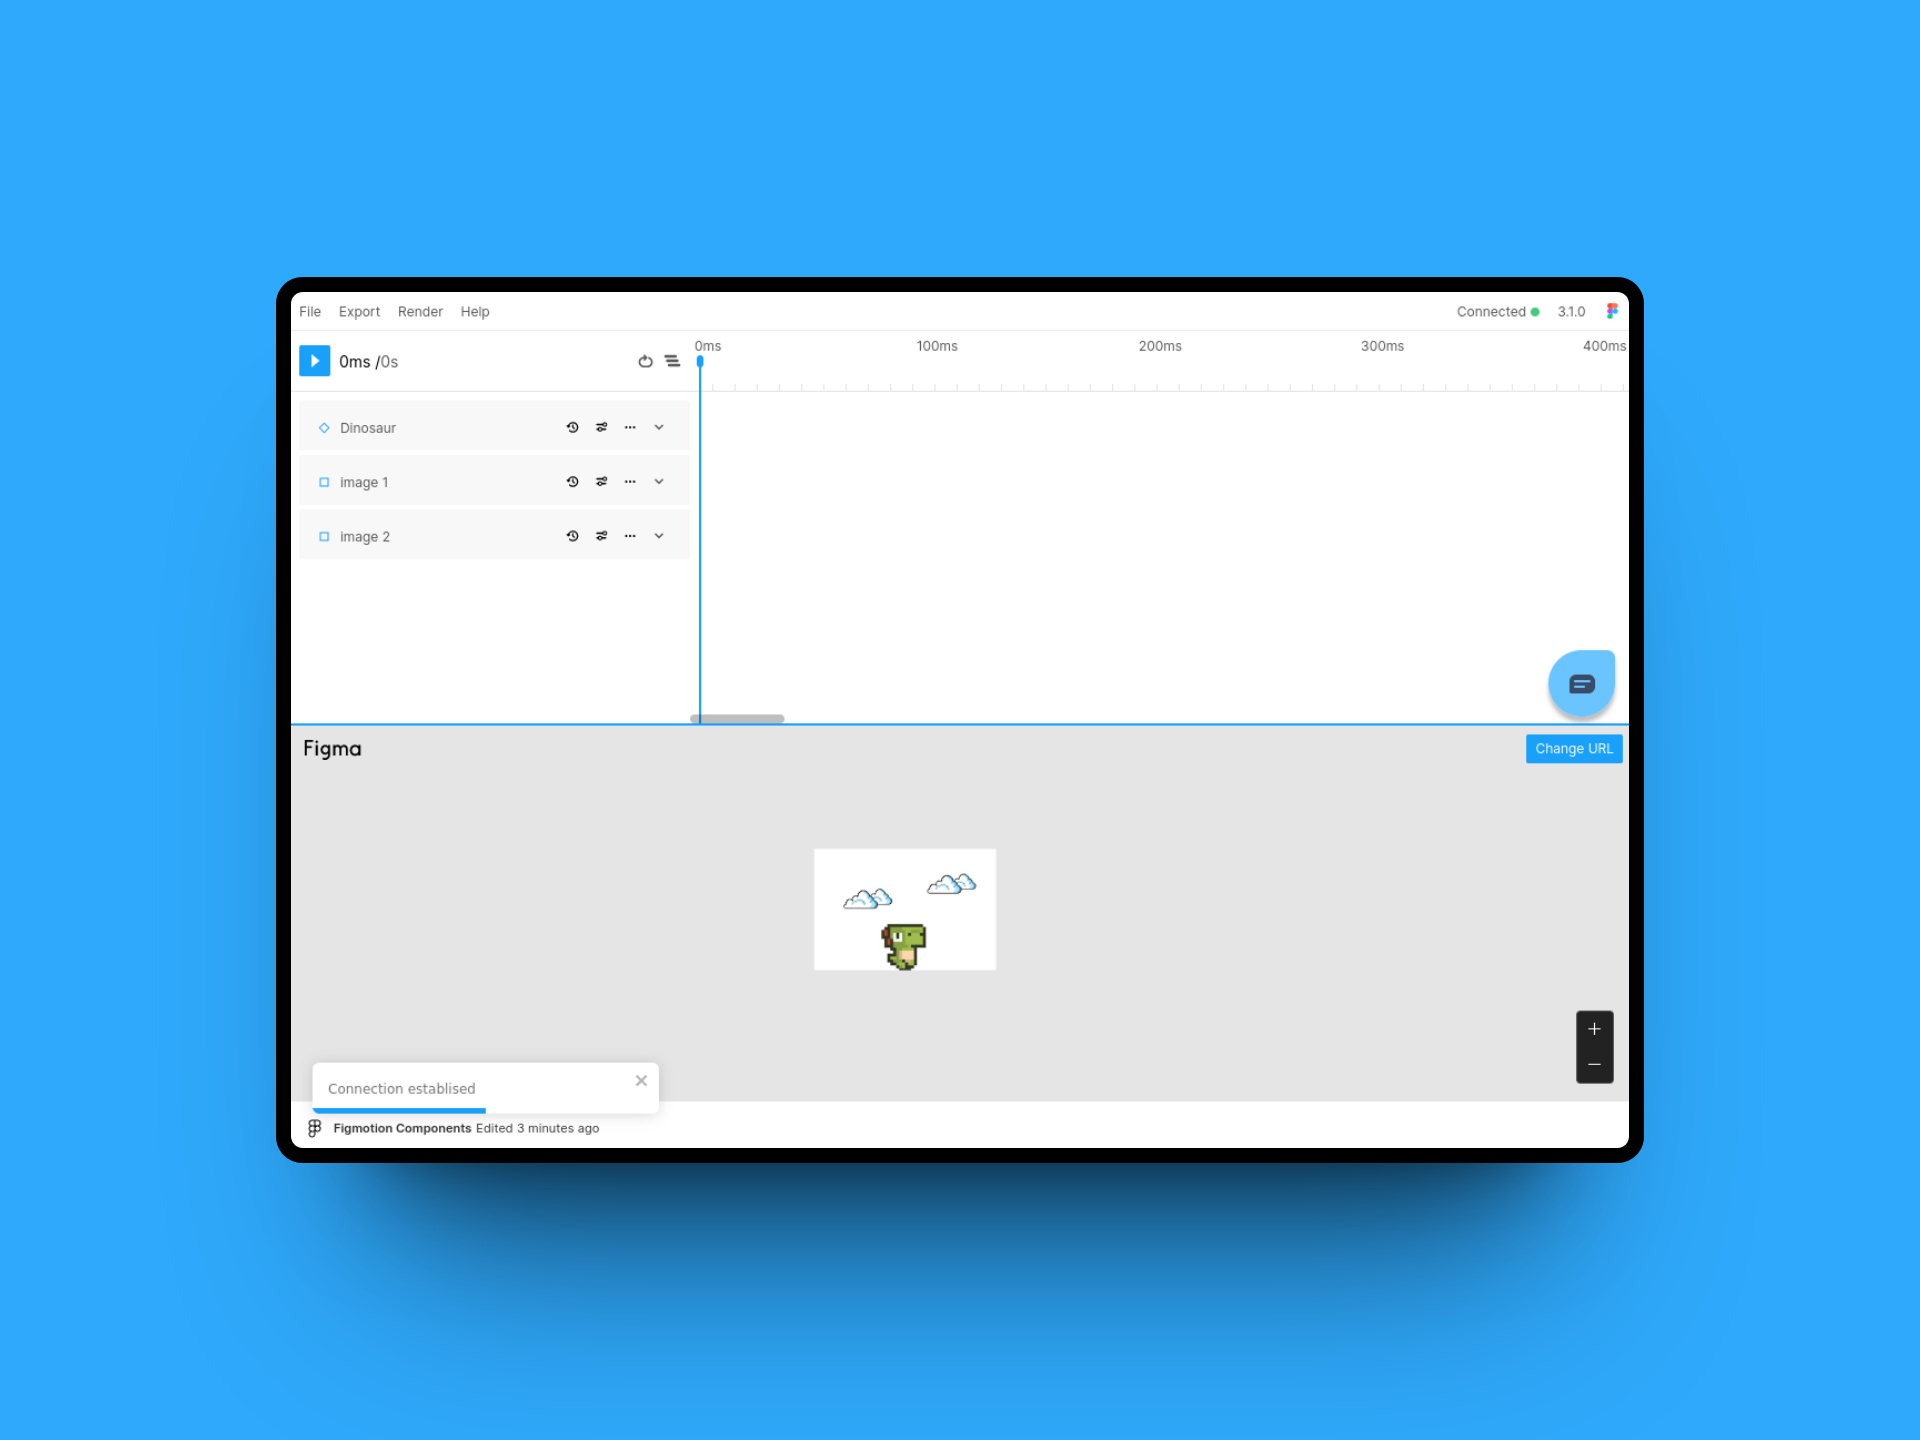
You should see something like below. (you will see I have the Figma preview window open, you can toggle this using the Figma icon in the top right or with the shortcut CTRL/CMD+ALT+P)

Figmotion window

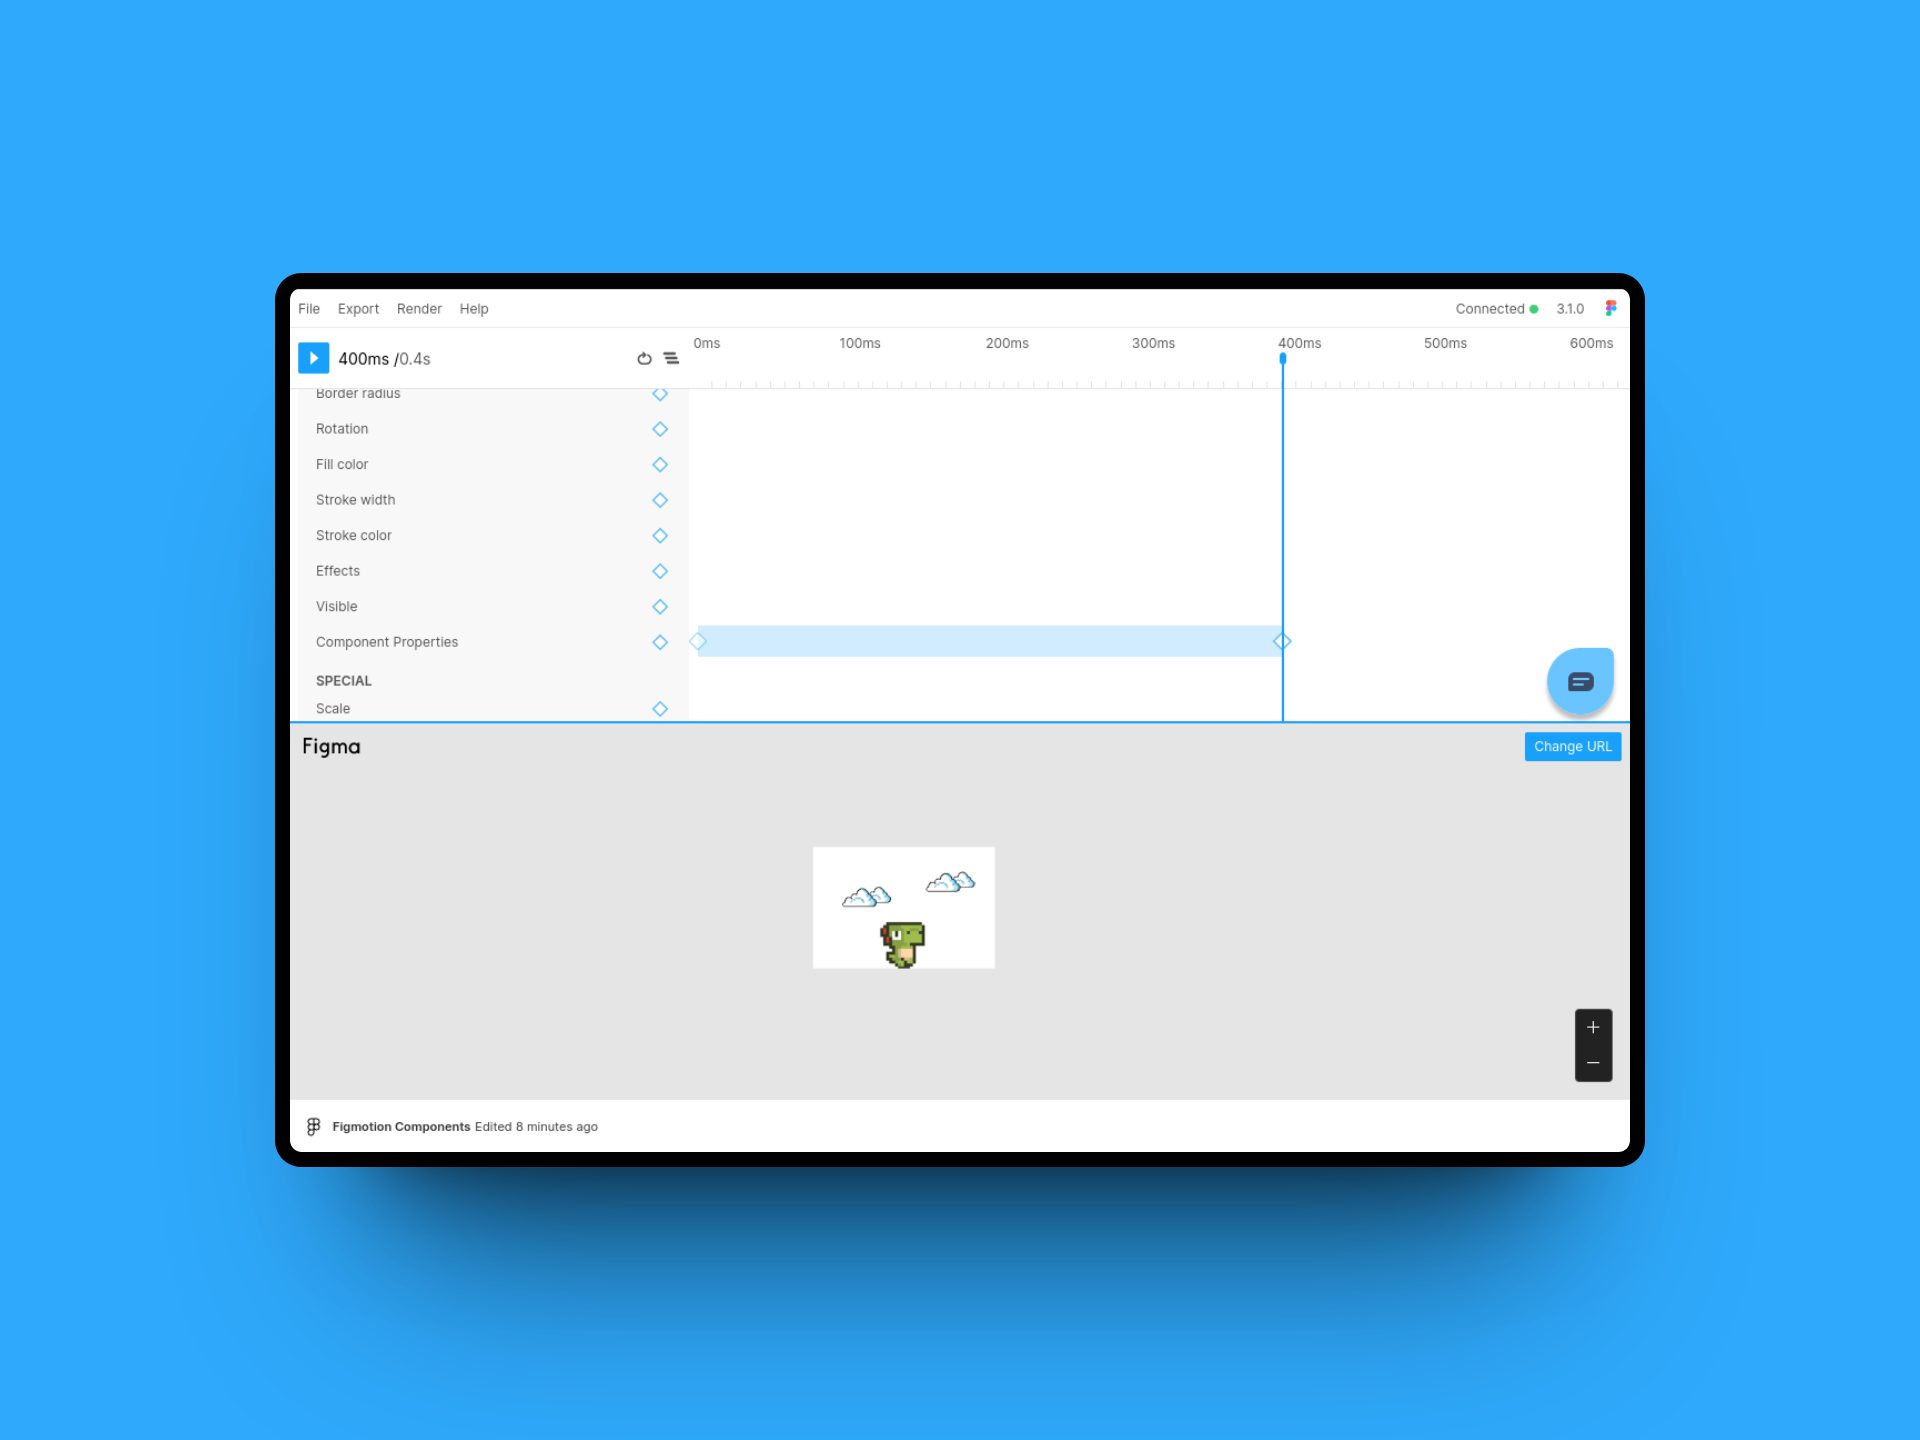
Creating the actual sprite animation only takes a few clicks. Just expand, the Dinosaur layer, move your time handle to 400ms and add a keyframe for the Component properties property.

Figmotion window

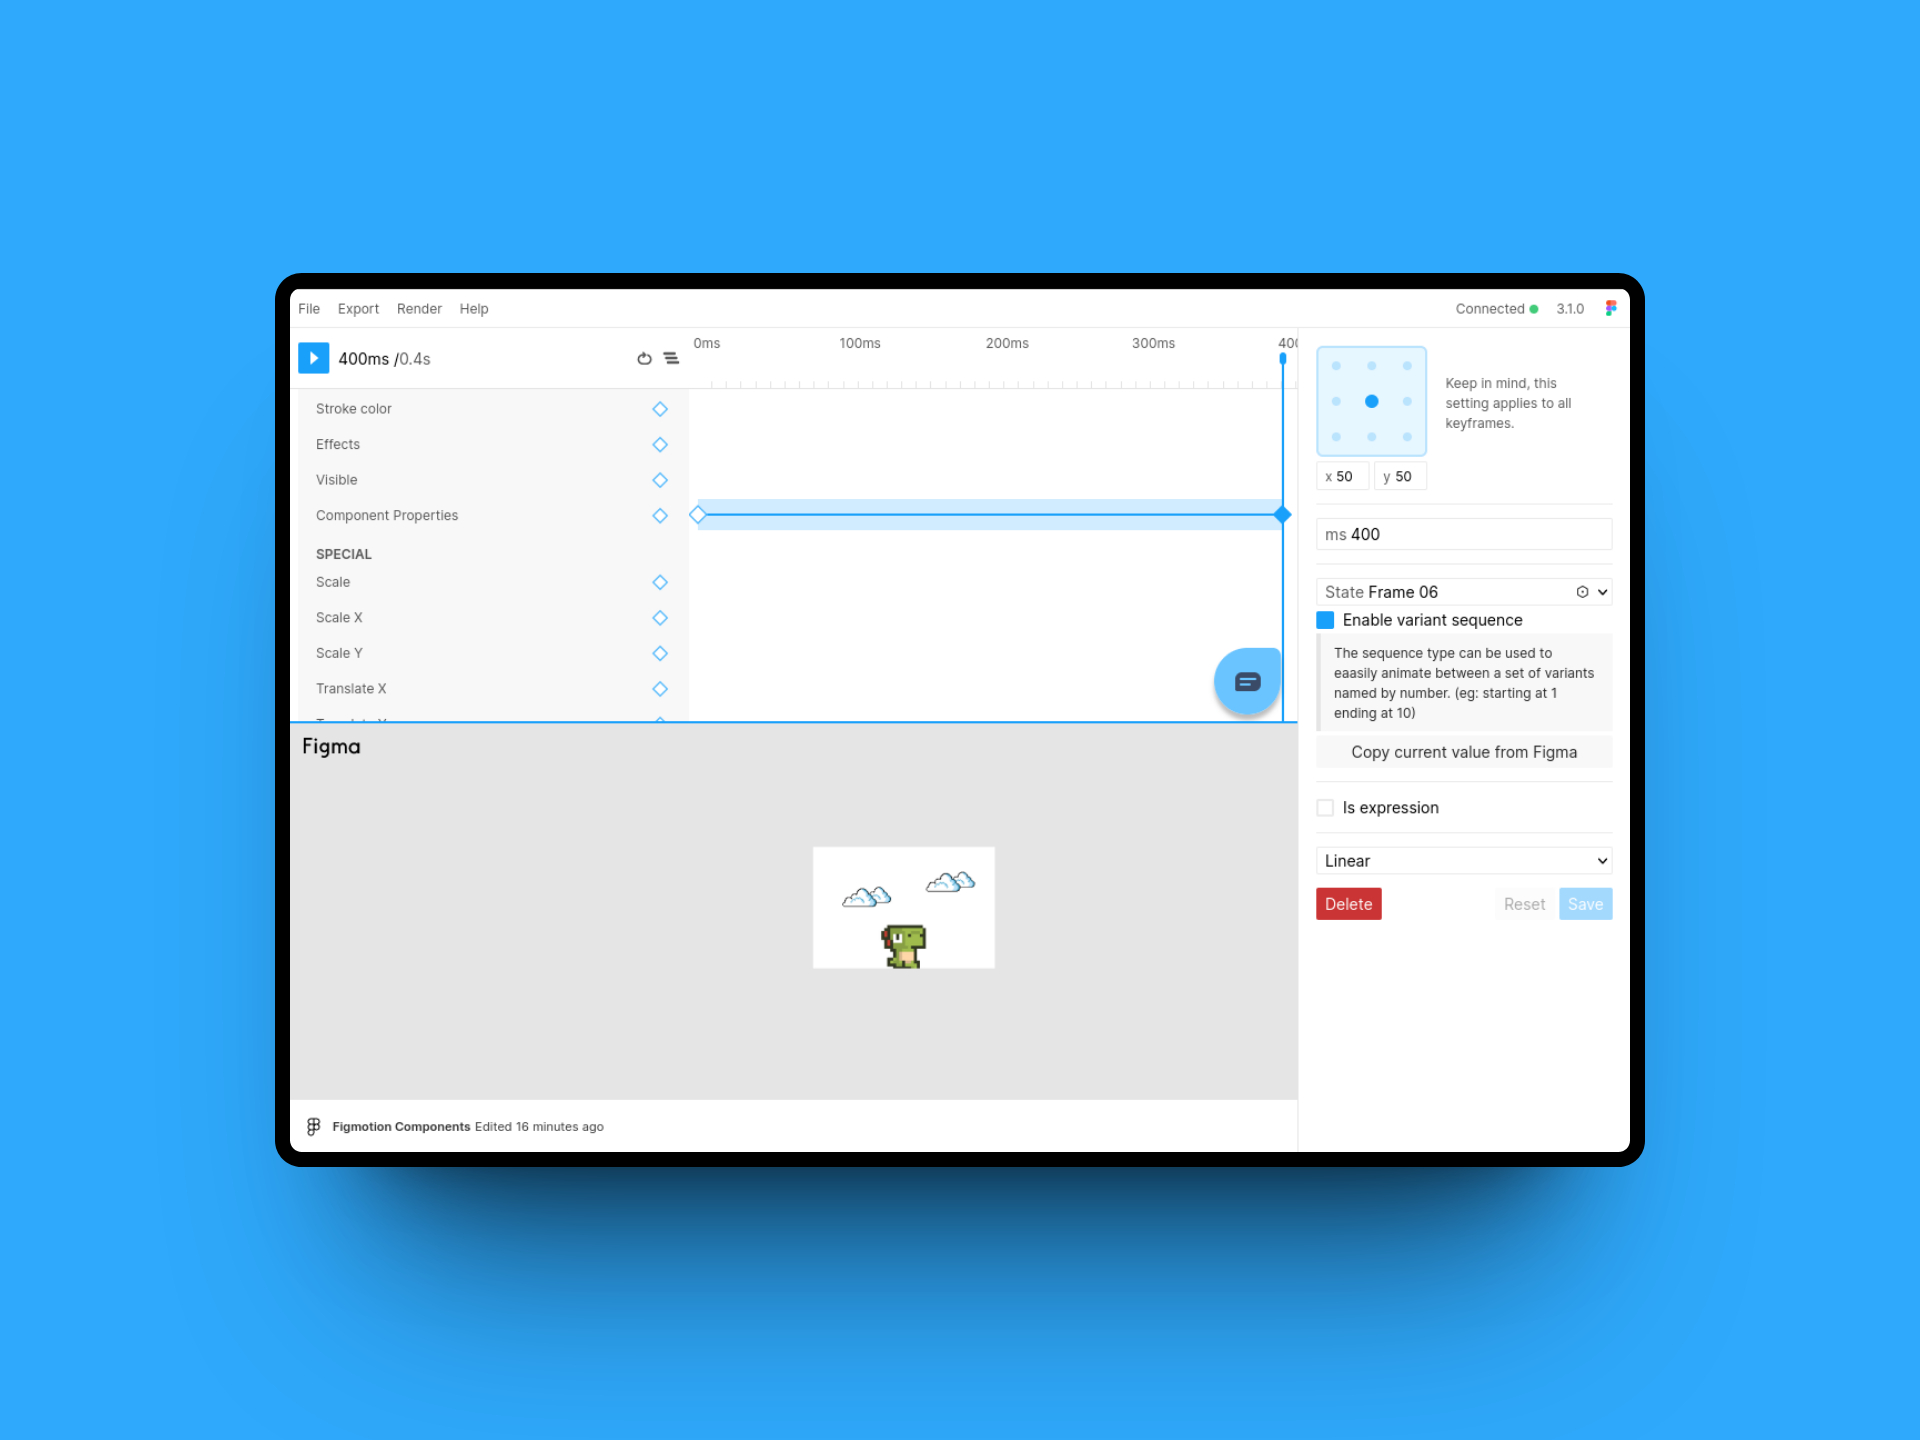
Figmotion will have created 2 keyframes for you, one at the start and one at the 400ms mark. You can select the latter and change it's State value to Frame 06. If you saved this property as-is Figmotion will just animate from Frame 01 to Frame 06, skipping all frames in between. For this reason, the Enable variant sequence flag was added. When you enable this and save the keyframe, Figmotion will automatically interpolate the frames inbetween by their sequence number. This can also be eased to control the speed of the sprite.

Sequence

That's it - we can render it out and behold the result!

Result

· 3 min read
Liam Martens

Introducing version history and paid plans 🎉

Figmotion was first introduced on the day Figma made plugins publicly available in 2020. At that time, it was a very rudimentary animation plugin that simply got the job done, no more.

However, to this day, the vision of Figmotion still stands, which is to allow anyone to learn keyframe-based animation tooling and make it accessible to all platforms—no need for a powerful machine or a Macbook Pro.

This is also why I initially set out to create Figmotion. I was and still am a Linux user, and there were no easy ways to create quick and easy animations on Linux. Figma opened up the world of UX and UI design to me, and I set out to do the same with Figmotion for animation.

Since then, countless hours have been spent developing Figmotion. It is a passion project on which I have spent many days, weeks, and months, and today marks a huge day for me and for Figmotion.

I am officially introducing 2 paid plans for Figmotion, but don't worry all, existing features will still be available as is. The paid plans (Standard & Professional) come with specific new features such as priority rendering, version history, variable support, and a higher GIF resolution. Both plans will also receive more advanced features in the future.

You can check out the new plans in Figmotion by going to File > Upgrade Plan or you can check out the homepage

Other new features

Additionally, this release also comes with some exciting new features for the everyone.

Translate X and Y properties

These new properties allow you to animate layers relatively to their initial position instead of using "absolute positioning". This can be useful for entry and exit animations.

Text content property

Only supported in single font text layers
This new property makes it easy to create "typing text" animations. It can even make use of easing to vary the typing speed.
Typing Text

Item spacing & padding properties

These new properties make it possible to animate the item spacing and padding of auto-layout frames.

Figma preview panel

This new panel allows you to preview your design inside of Figmotion if you are not using the windows side-by-side or if you are exclusively using the timeline window.

· 3 min read
Liam Martens

The question

Recently, I was asked about tips on how to create a sliding gallery animation. Of course you can simply do this by setting keyframes at set intervals and sliding the frame over by a set amount adding wait times in between each image sliding.

I got thinking however and I thought "you can probably do this using an expression" and so I came up with an expression to do this automatically! Let's dive into it.

The solution

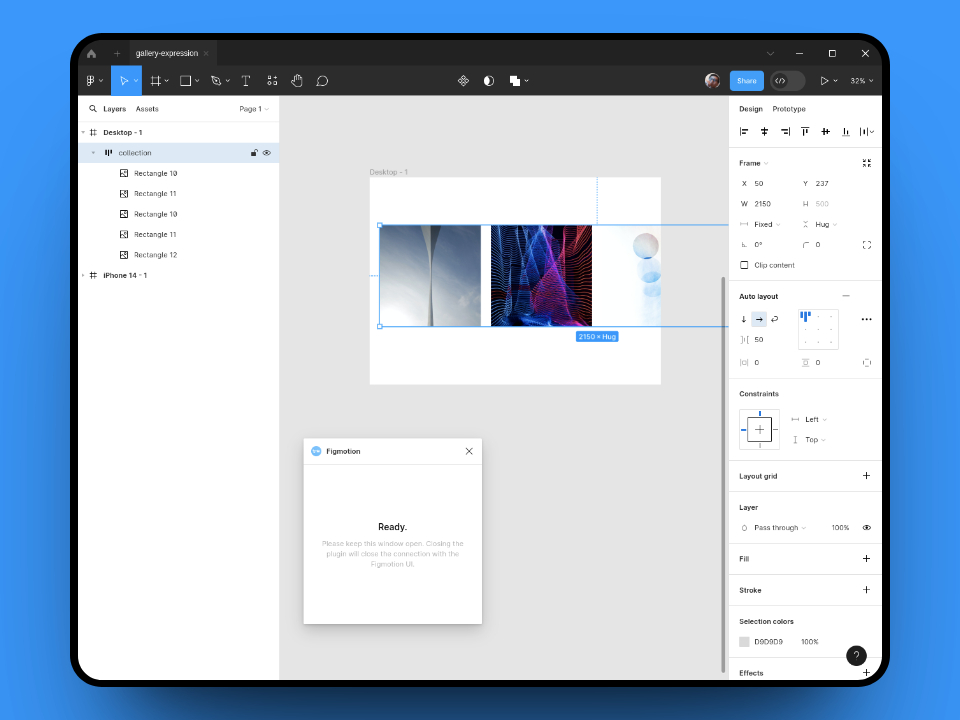
As always, we will start by setting up the design. Our set-up will be very simple. We start with a desktop viewport Frame and add another Frame which will hold our images. Each image will be 500px wide and we can enable auto-layout on the collection frame, setting the spacing to 50px. You will end up with something like this:

Design

Next we will figure out the parameters of our expression:

  1. How long should each image be paused for? Let's take 1000ms for this example.
  2. How long should the transition between image be? We will use 300ms.
  3. What's the distance the frame needs to move, to show the next image? In our example, the images are 500px wide and have a spacing of 50px between each image.
  4. How far from the side will the Frame (which holds the images) start? In our example, there is a 50px spacing on the left side.
  5. How many images are we animating? In our case we will go through 4 images. (this is one less than all the images, so we will end on the last image)

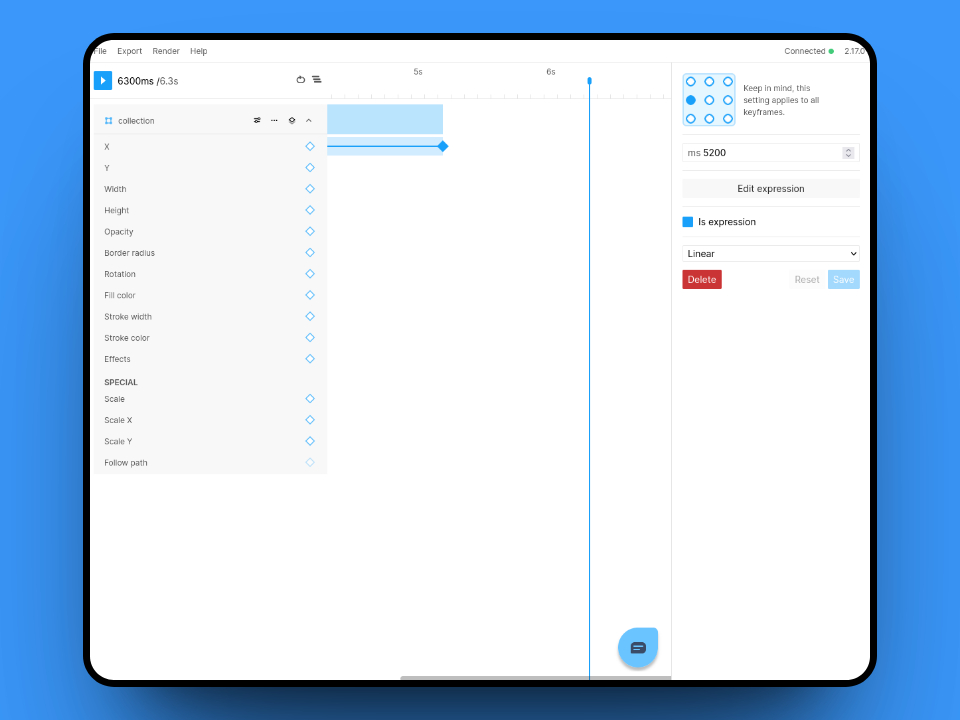
Using these values, we can figure out where our x property expression keyframe needs to go. The total time for each image is 1300ms (the sum of the wait time and the transition time), which means our keyframe will be set at 5200. Note: you will need to extend the timeline by clicking the + at the 6s mark

Next we can edit the keyframe and enable the Is expression flag. We will also change the anchor point to the left side, this is because we want the collection frame to be aligned on the left side.

Is expression

Now are ready to enter the expression, so go ahead and click Edit expression.

We will be using the expression format below:

(SPACING_LEFT+Math.floor(time/TOTAL_TIME_PER_IMAGE)*(-IMAGE_MOVE_DISTANCE))
+(Math.max(((time % TOTAL_TIME_PER_IMAGE) - WAIT_TIME_PER_IMAGE), 0))/TRANSITION_TIME_PER_IMAGE * -IMAGE_MOVE_DISTANCE

With our final expression looking like this:

(50+Math.floor(time/1300)*(-550))
+(Math.max(((time % 1300) - 1000), 0))/300 * -550

Great! That's it! You will now have a sliding image gallery using just a single keyframe. Of course, the expression can be updated to any number of images and any size.

· 3 min read
Liam Martens

In this mini tutorial we will learn how to create a staggered title animation. The final result will look something like this:

Set up design file

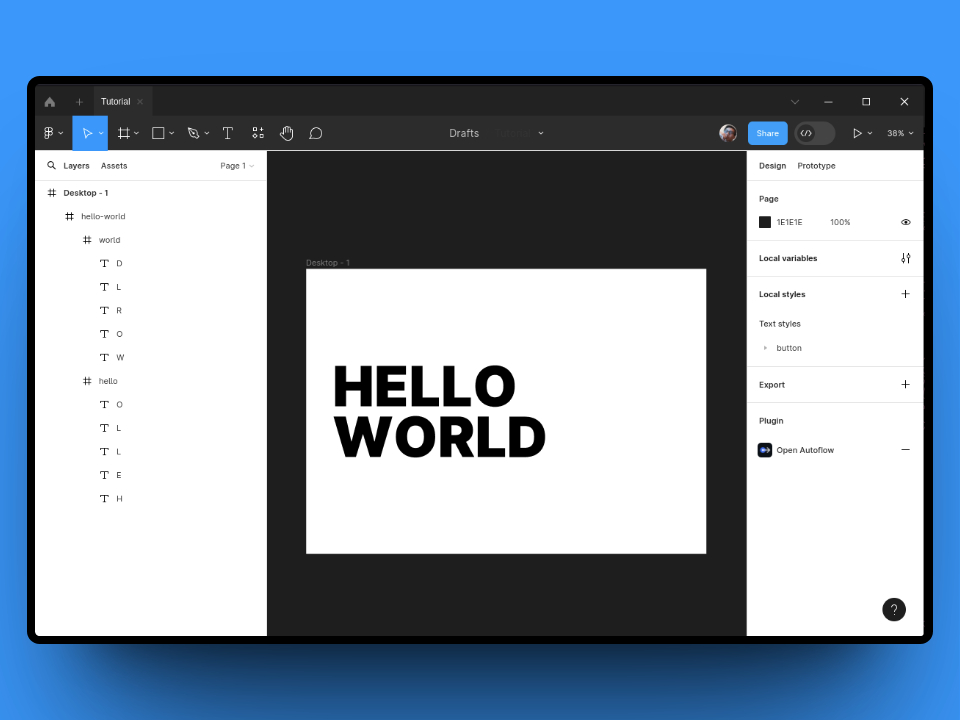
To start out we will need to set-up our design file. For this animation we will need to create a separate element for each letter so it can be animated individually. Additionally we will need to make sure the order of the layers is correct for the stagger to apply correctly. This means the words need to be spelled out from the bottom layer to the top.

In the end your layers will look something like this:

Design & Layers Panel

Let's animate!

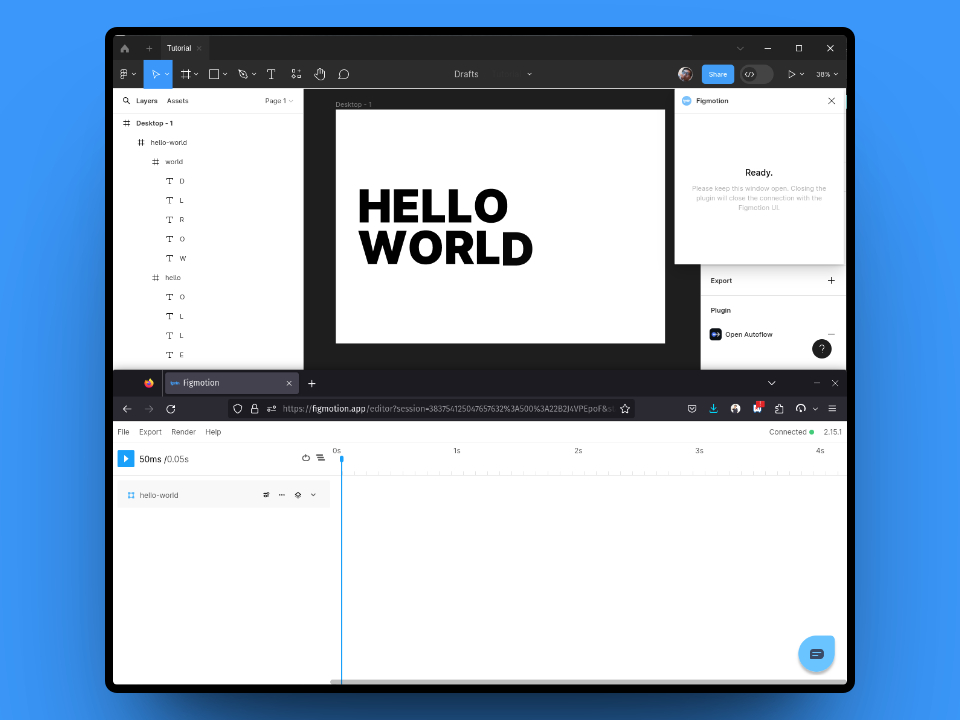
Once our Frame has been set-up, we can open up Figmotion. You can do this by selectin Figmotion from your plugins menu and logging in to the newly opened timeline window. The timeline window is separate from your Figma editor but it will still be connected to your design. This means you can simply place them side by side (or below one another).

Once completed, you will see something like this (in this case the timeline was placed below the Figma editor)

Timeline & Design window

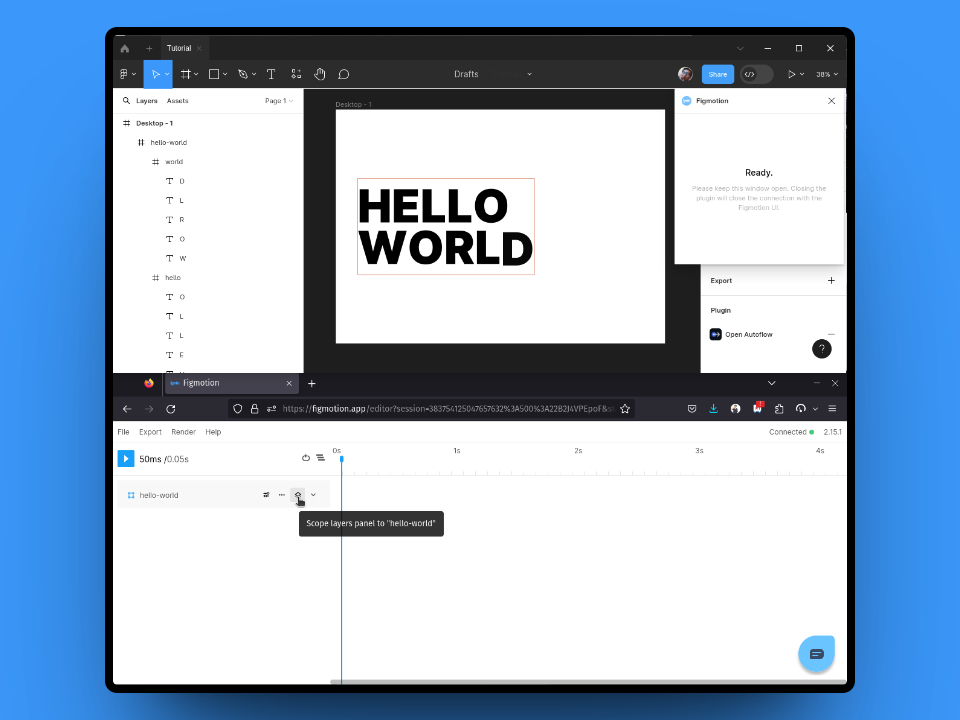
In the example file the layers we need to target are inside the hello-world layer. To access the child layers we can select the "Scope layers panel" button. This will scope the layers panel, to the selected frame and display it's children. (you can click the same button to "unscope" the layer)

Scope layers

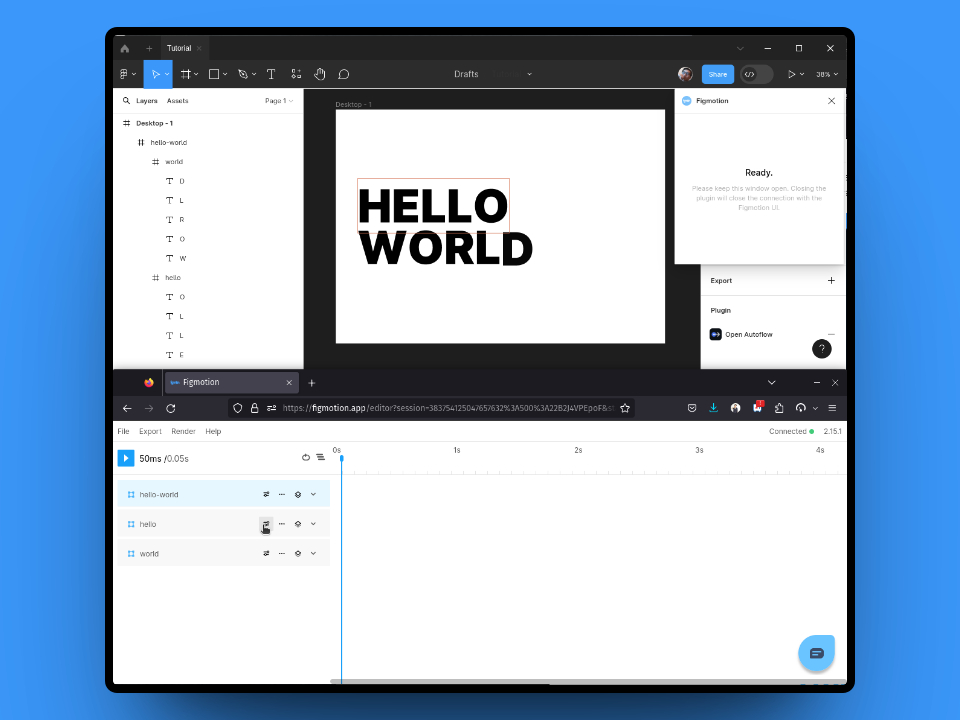
Now we have access to the "hello" and "world" frames, each of which contains their respective letter. Let's start by applying a preset to the "hello" frame.

Apply preset - hello

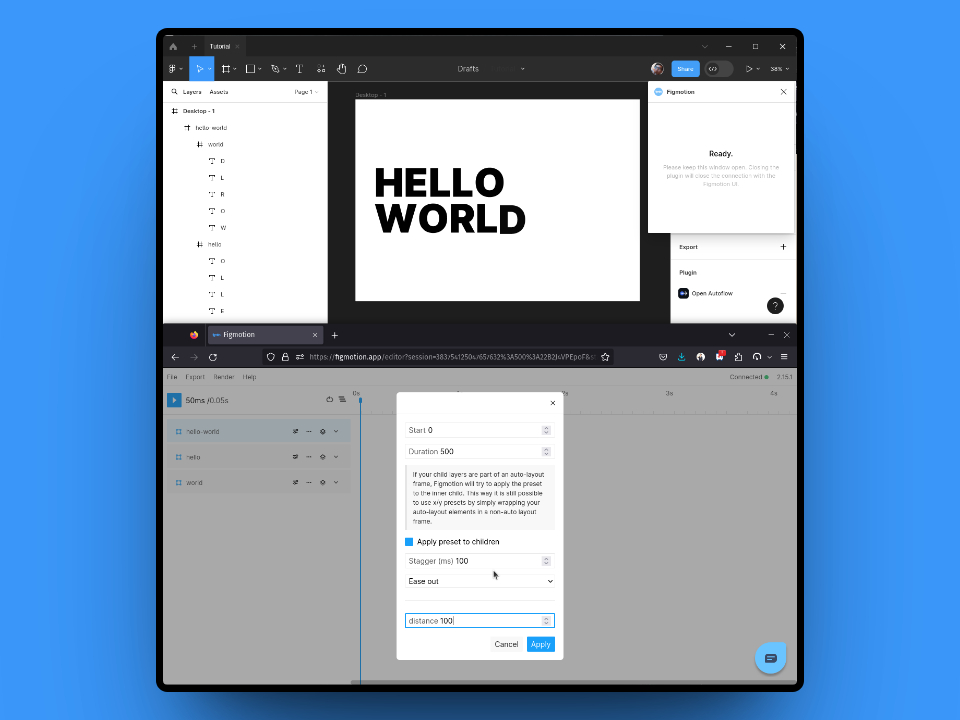
Let's select the "Fade in up" preset and configure it with the following settings:

SettingValueExplanation
Start0The preset will start at 0ms
Duration500This is the duration of each element's animation (in ms)
Apply preset to childrenConfigures the preset to be applied to it's children
Stagger100The delay between each child (in ms)
Distance100This is the distance to fade up

Configure preset

After applying this staggered preset, you can play the animation and you will see the first word animate in as expected.

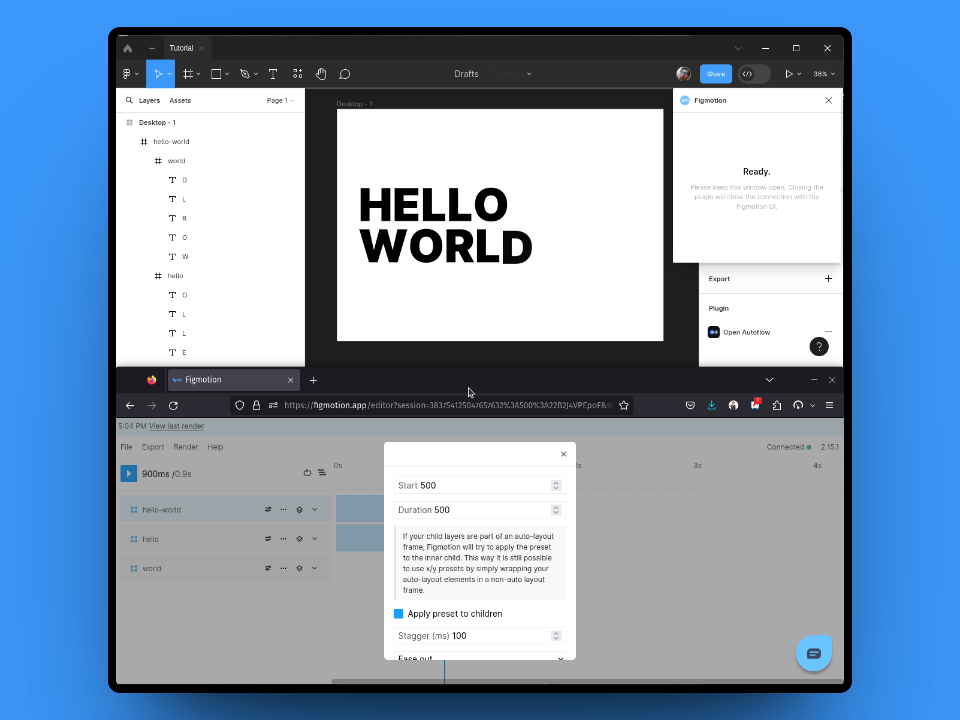
To complete the animation we will apply the same preset to the "world" frame, but we will delay the start of the animation by 500ms.

Configure preset - world

That's it!

That's it, it really is that easy. You can now see the full animation by pressing play and you can render it out to share.

Some variations

You can always play around with the presets and the configuration, here are some more examples of the same design with different presets:

Opposite sides (vertical)

From left

· 7 min read
Liam Martens

Creating the animation

Step 1: Set-up the design

To begin, we'll establish our design. In this case, I've arranged the file for you, which is available for download here. After downloading, you can import the file into Figma and you will see something like this:
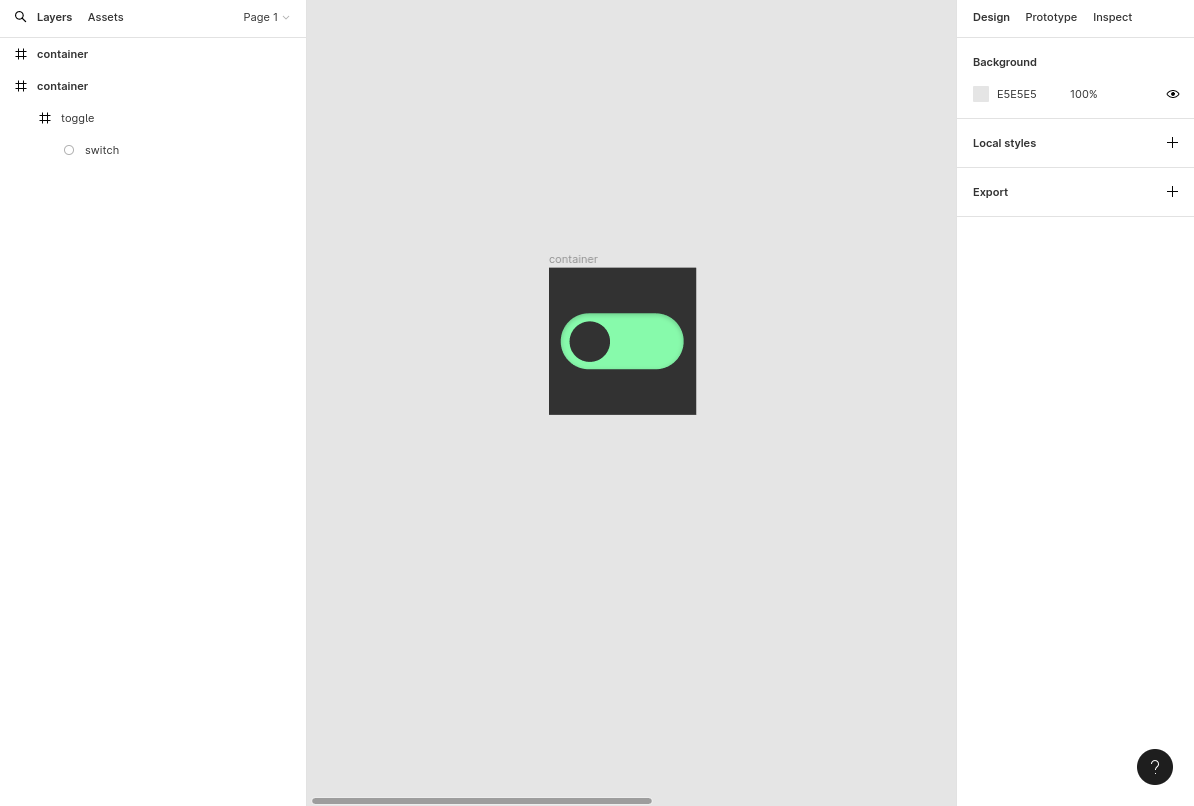
Design

Step 2: Open Figmotion

With our design file ready, we can launch Figmotion.
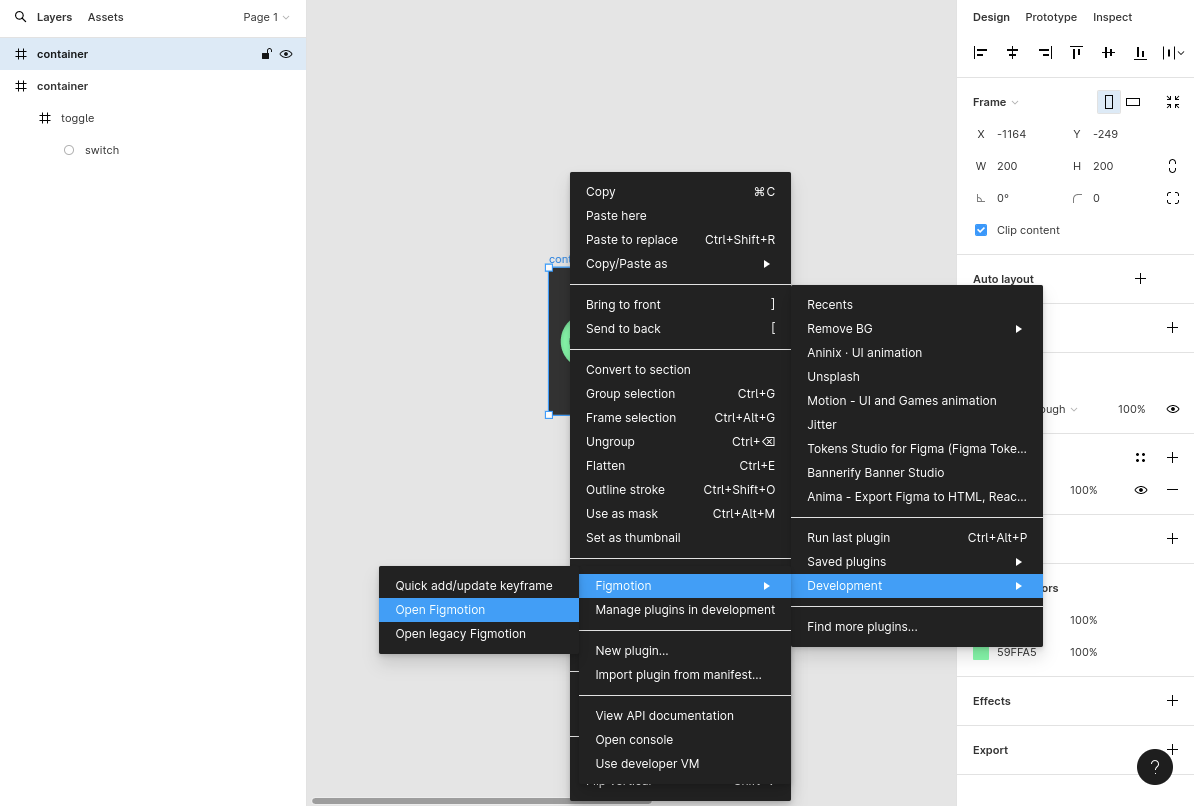
Open Figmotion

Step 3: Animate the toggle frame

We will start by fading in the green toggle frame.To accomplish this, we will position our handle at 500ms and select the "Add keyframe" button for the "Opacity" property.
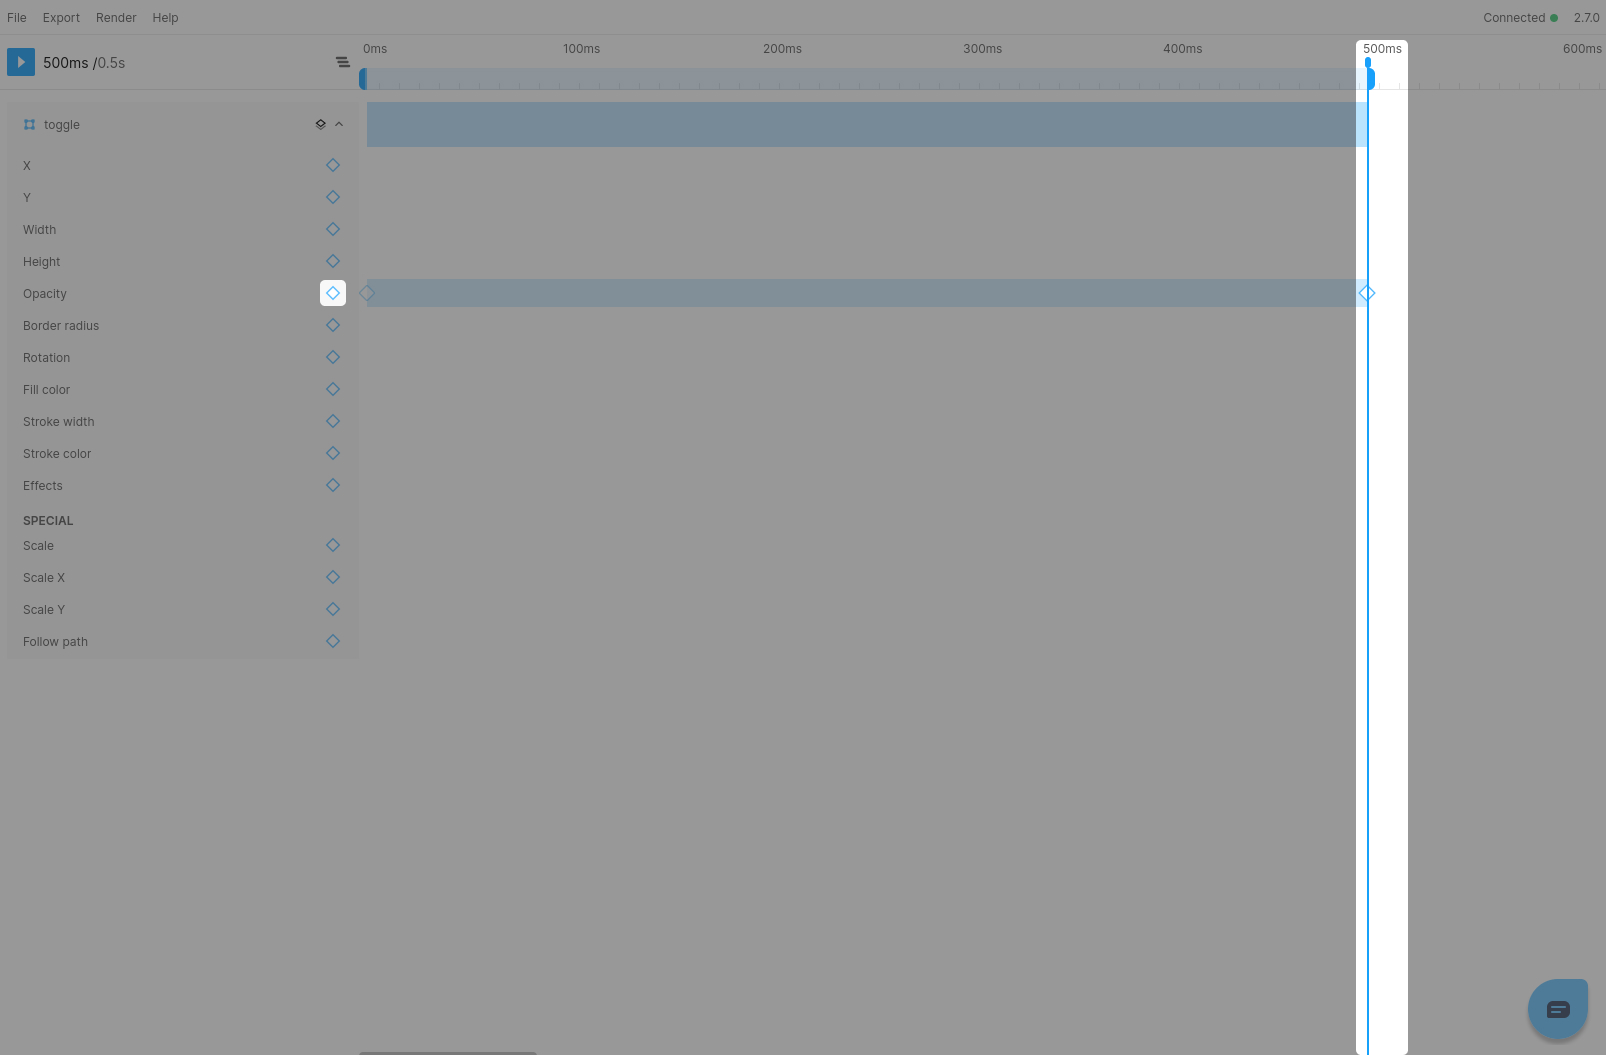
Opacity keyframe

By doing this, a keyframe will be inserted at 500ms, and a starting keyframe will be added at 0ms to establish our initial value, both of which will be set to 1. We can now proceed with adding our animation.

To begin, we will select the keyframe at 500ms and adjust the easing value to "Ease-out.". Don't forget to press the Save button to update the keyframe.
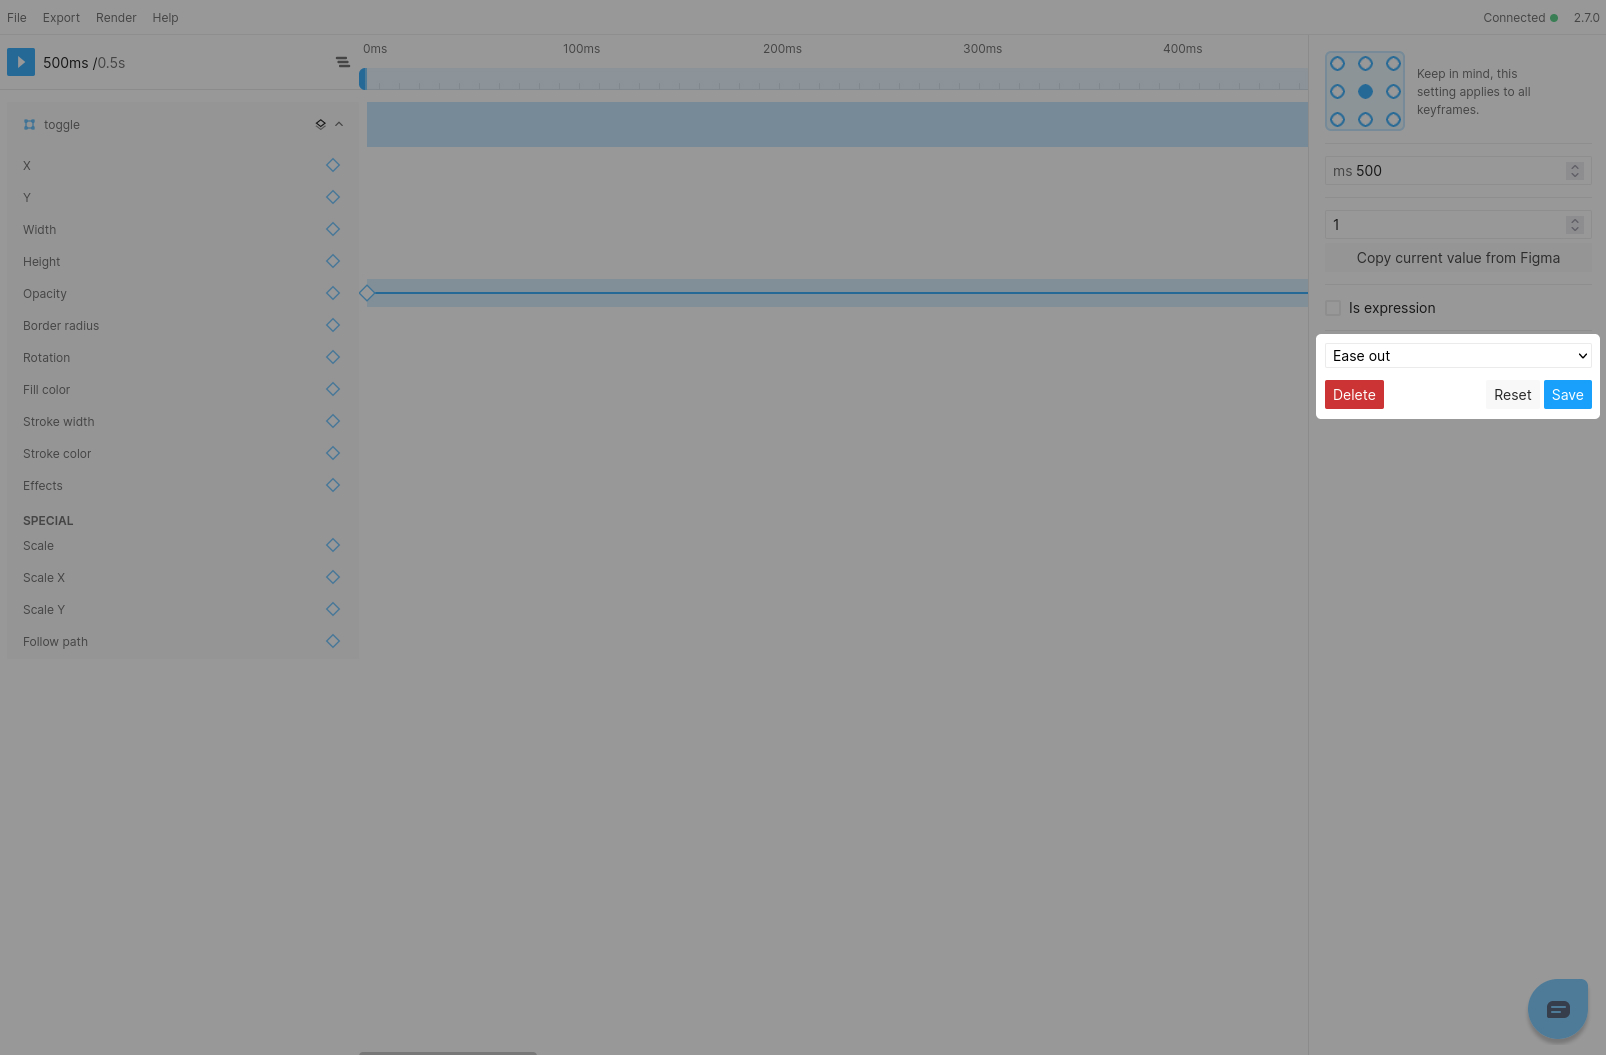
Ease Out Opacity

Moving forward, select the keyframe that establishes our initial value at 0ms and modify the value to 0. Once again, don't forget to press Save before closing the keyframe panel.
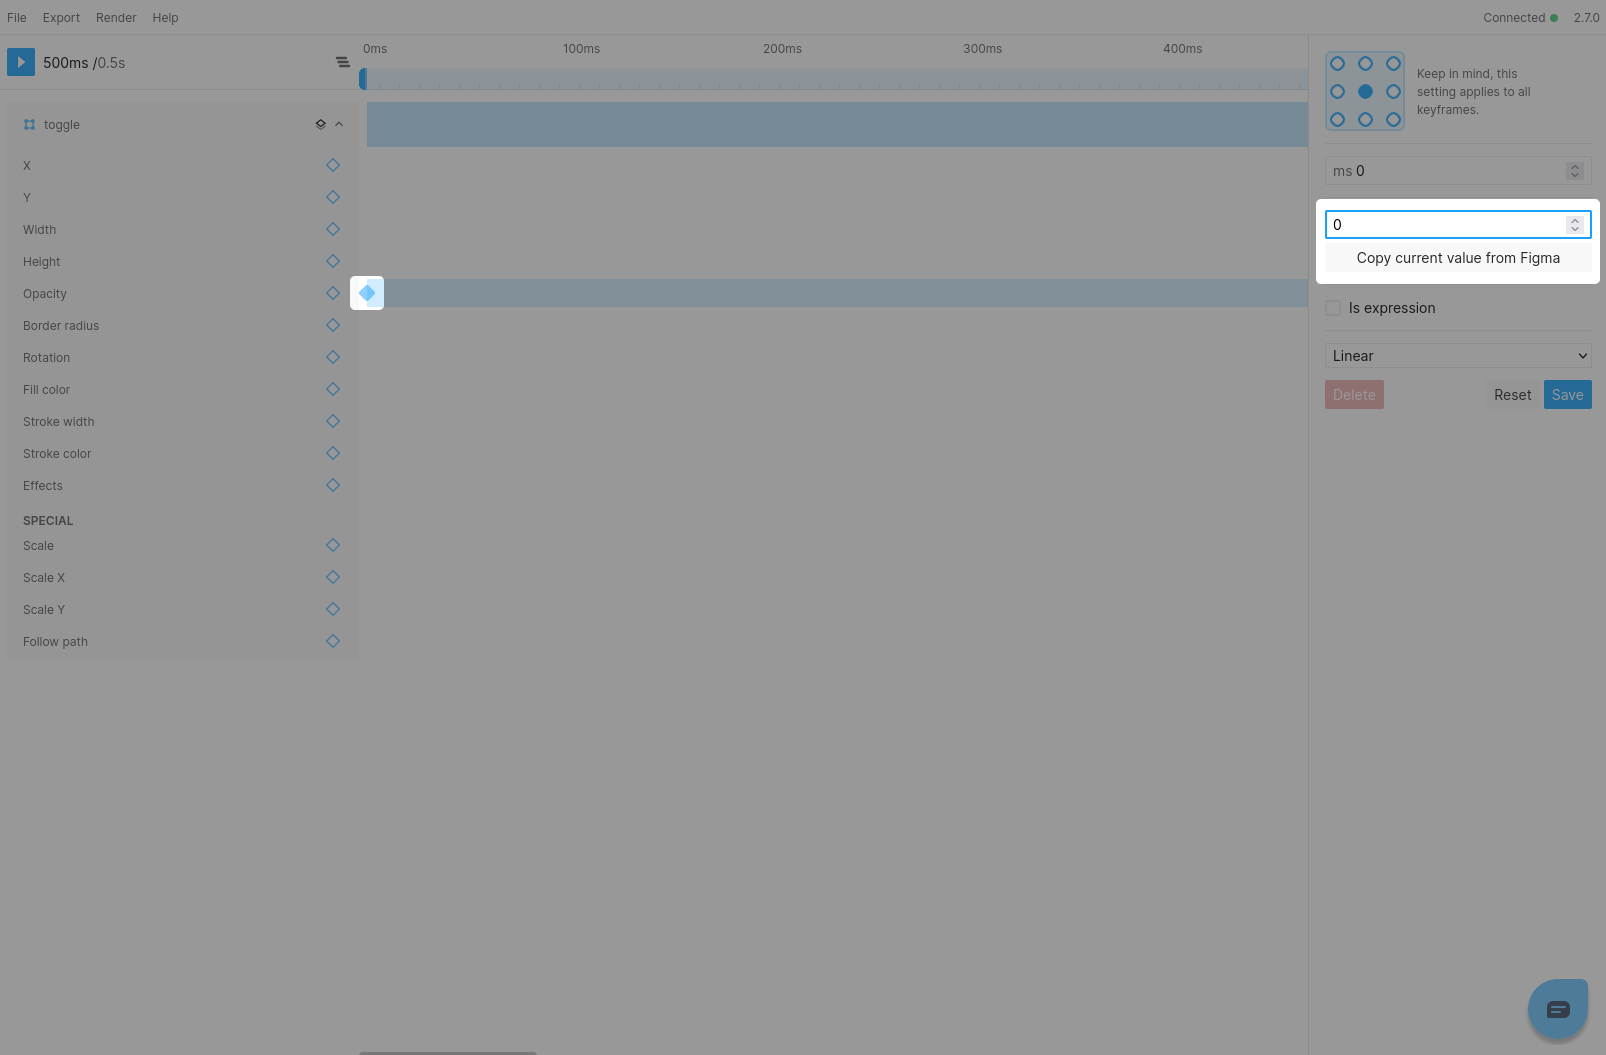
Set Initial Value

Once these steps are finished, the toggle will fade in as the animation plays.

Toggle Fade In

Step 4: Scaling in the switch

Moving forward, let's animate the switch. However, you may notice that the switch layer isn't visible in Figmotion's layer panel. There are two methods to access the switch layer:

  1. Your first option is to select the "Scope to layer" button besides the toggle layer. This will set the scope to the toggle layer and display it's children
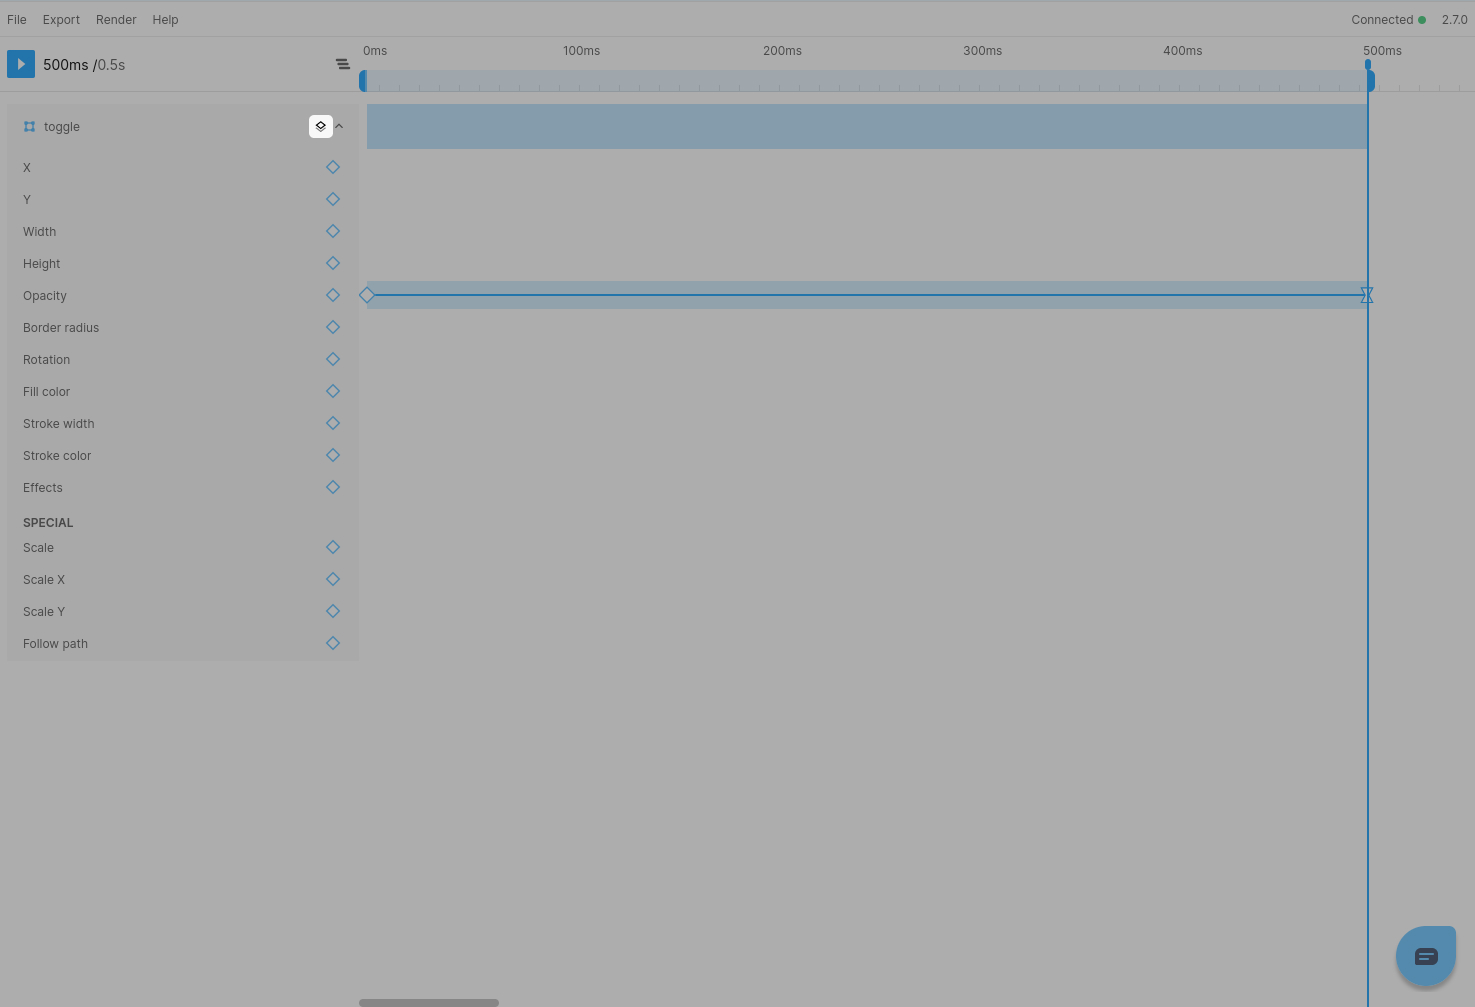
    Scope to layer

  2. Another approach is to use the CTRL/CMD+P shortcut to open the quick launcher. From there, you can input switch and press enter or select the switch layer to access it. This will set Figmotion's scope to the switch layer's parent. Quick Launcher
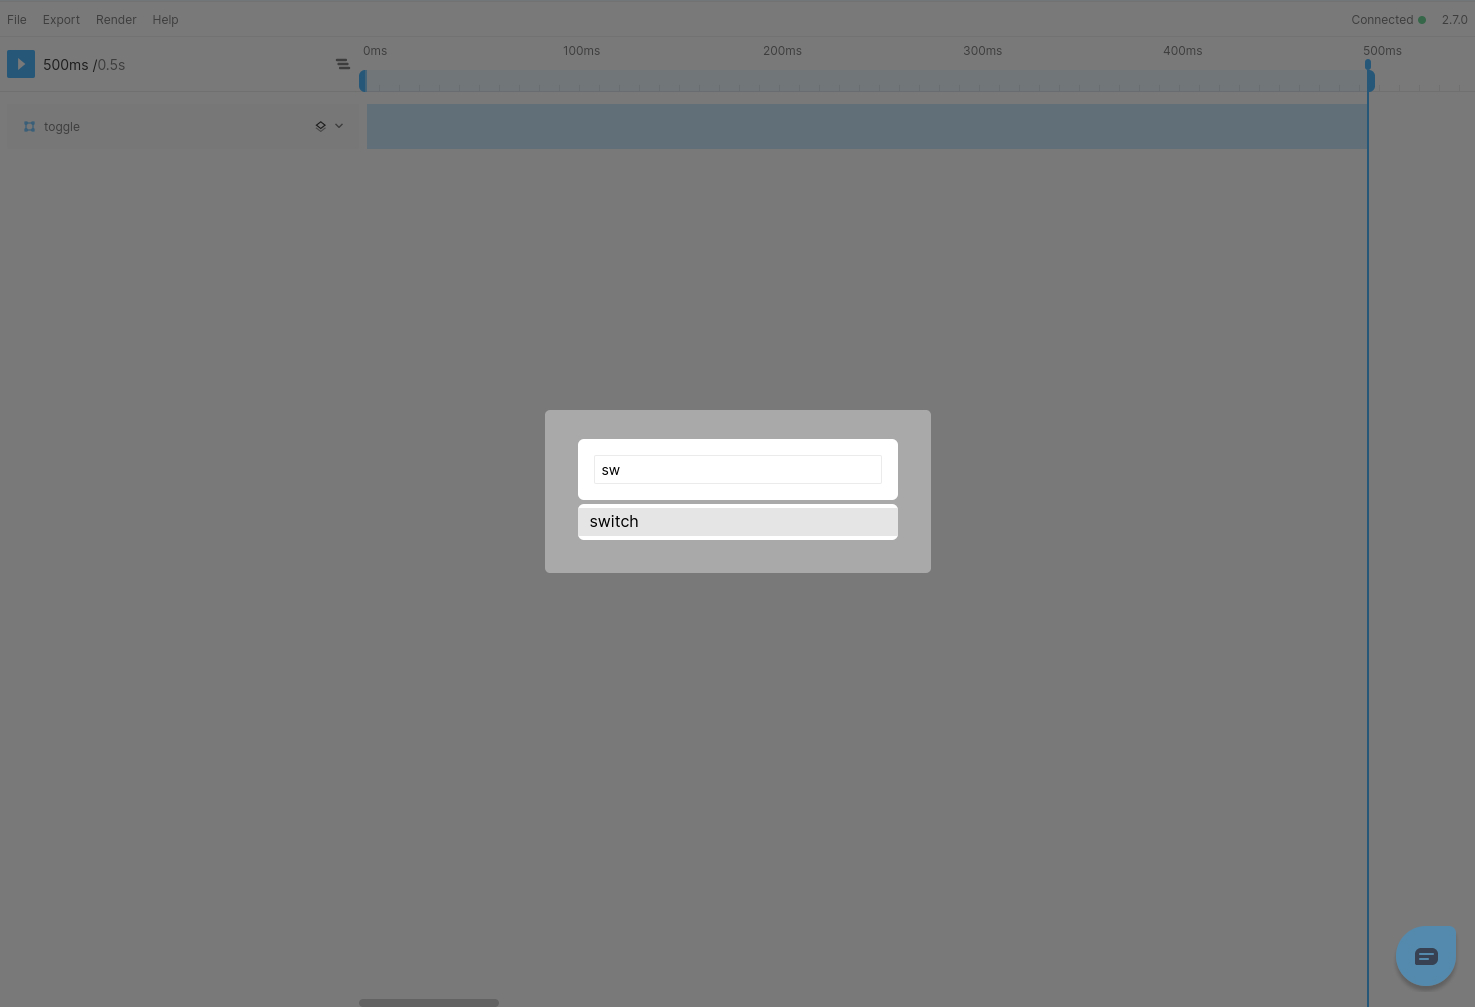
Note You can also use the quick launcher to reset the Figmotion scope back to the root of your frame.

Regardless of which method you choose, you will now see a view similar to this:
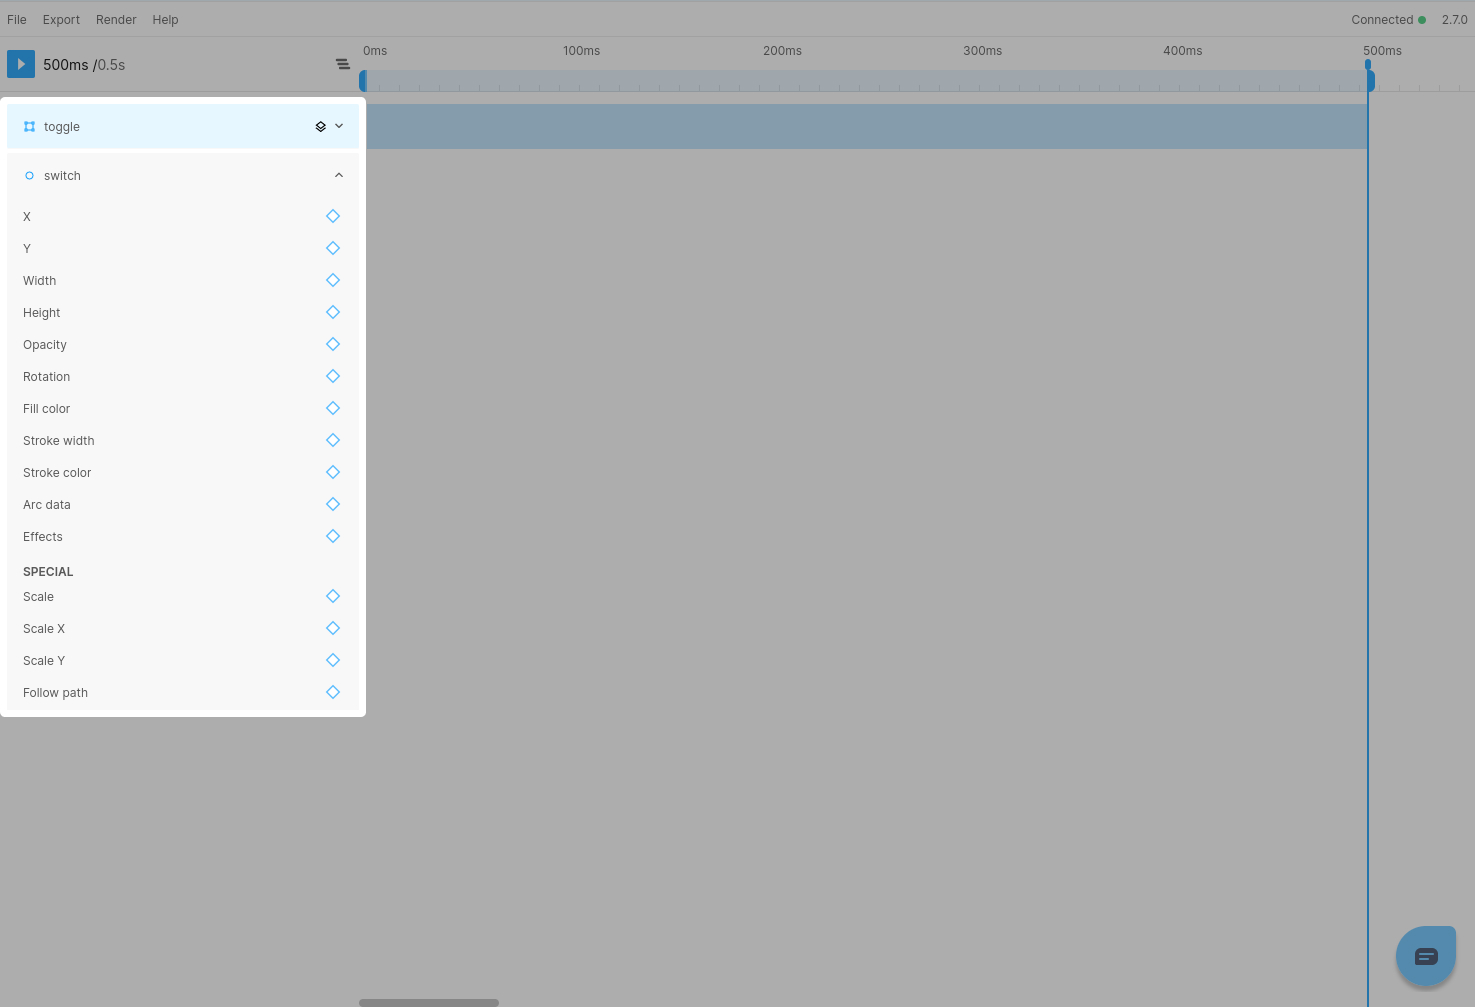
Switch Layer Visible

To start our animation, we will begin by scaling in the switch. This requires setting a keyframe for the Scale property at 500ms. The switch animation will begin only after the toggle has completely appeared. Therefore, the keyframe at 500ms will act as our initial value.
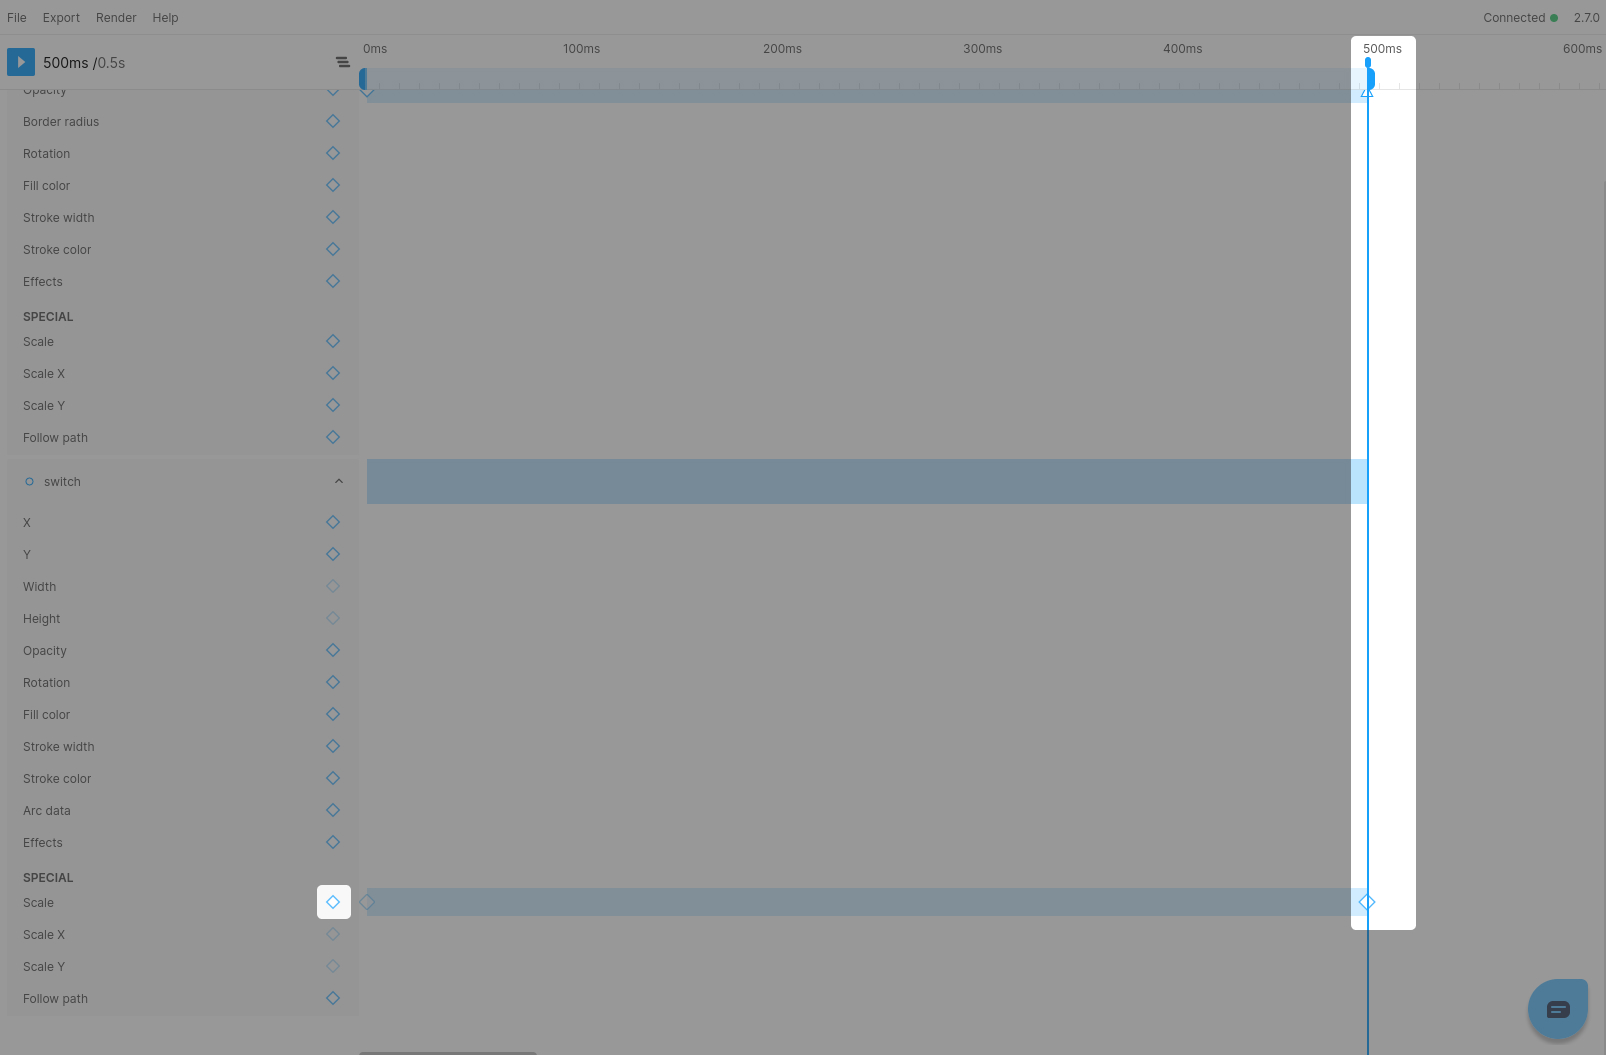
Initial Scale Keyframe

As you can see, the keyframe's value is currently set to 1. However, since we intend for the switch to start out hidden, we'll need to choose the 500ms keyframe and adjust its value to 0. Furthermore, we must also modify the value of the 0ms keyframe to 0.

Note You'll also observe an extra field labeled "Initial size" in the keyframe inspector. This value controls the element's size when it's fully scaled in. While it's automatically populated, you can modify it as required.
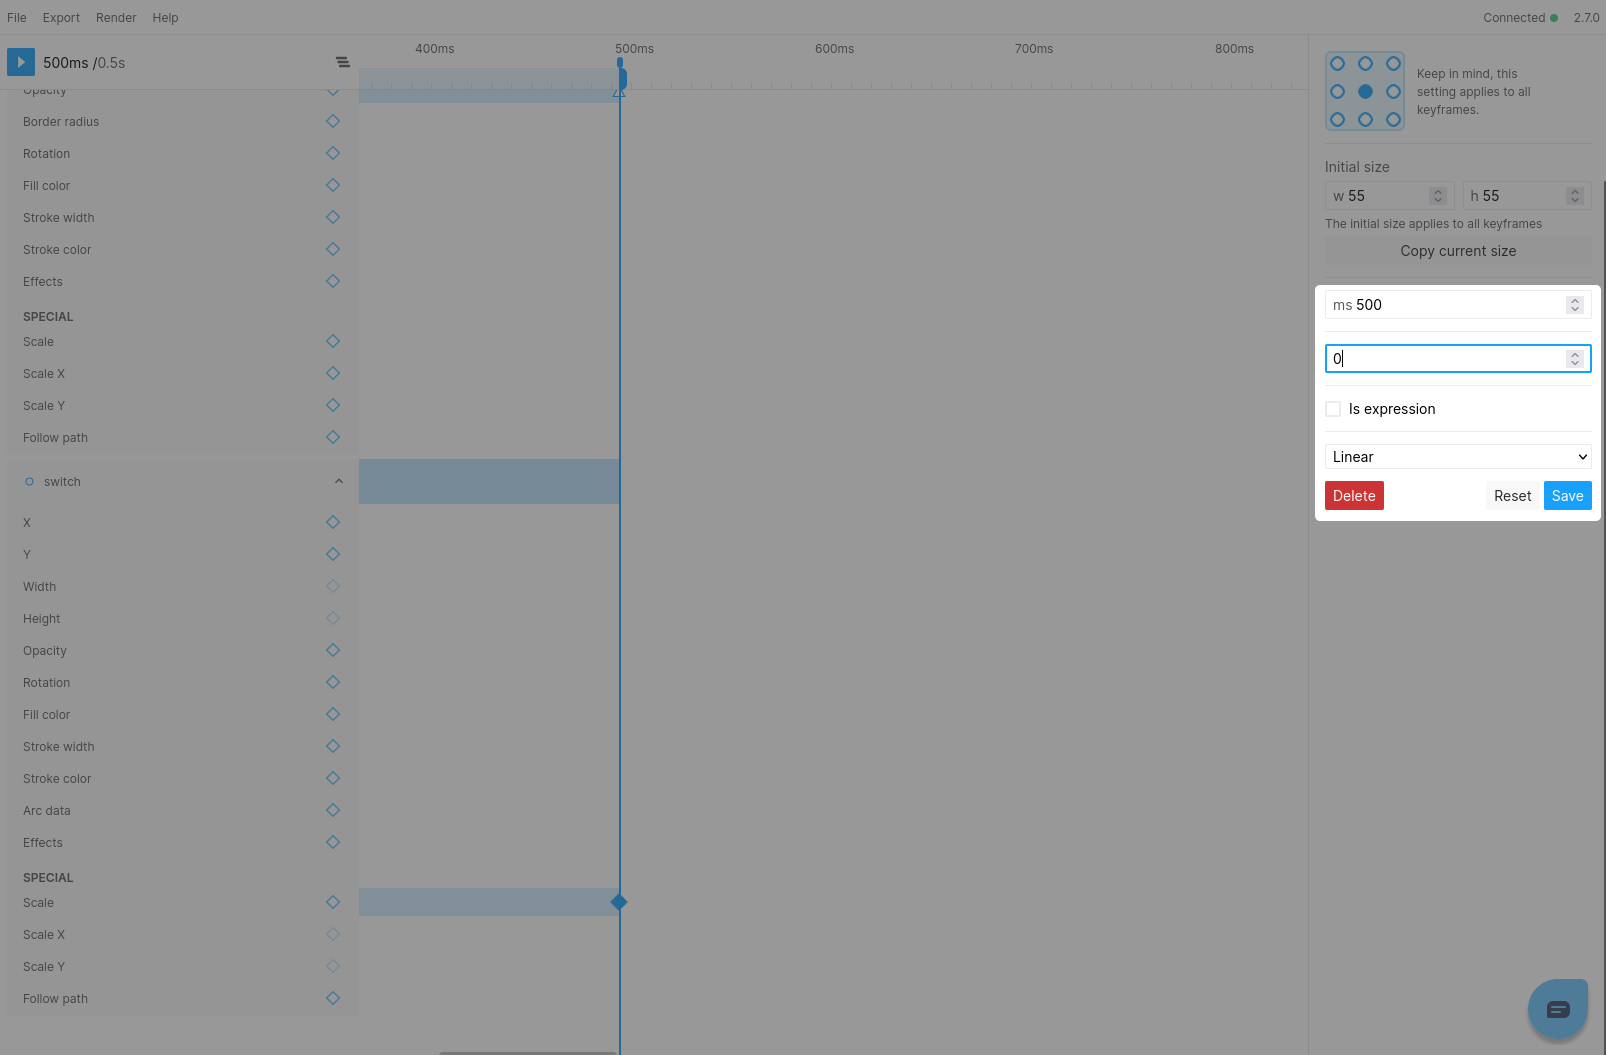
Scale 0

Afterward, we'll insert another keyframe at 1000ms, which will cause the switch to be completely scaled in. Please note that scale keyframes are always established as 1 by default. Therefore, we don't need to adjust the keyframe's value. However, we will modify the easing to Ease-out.
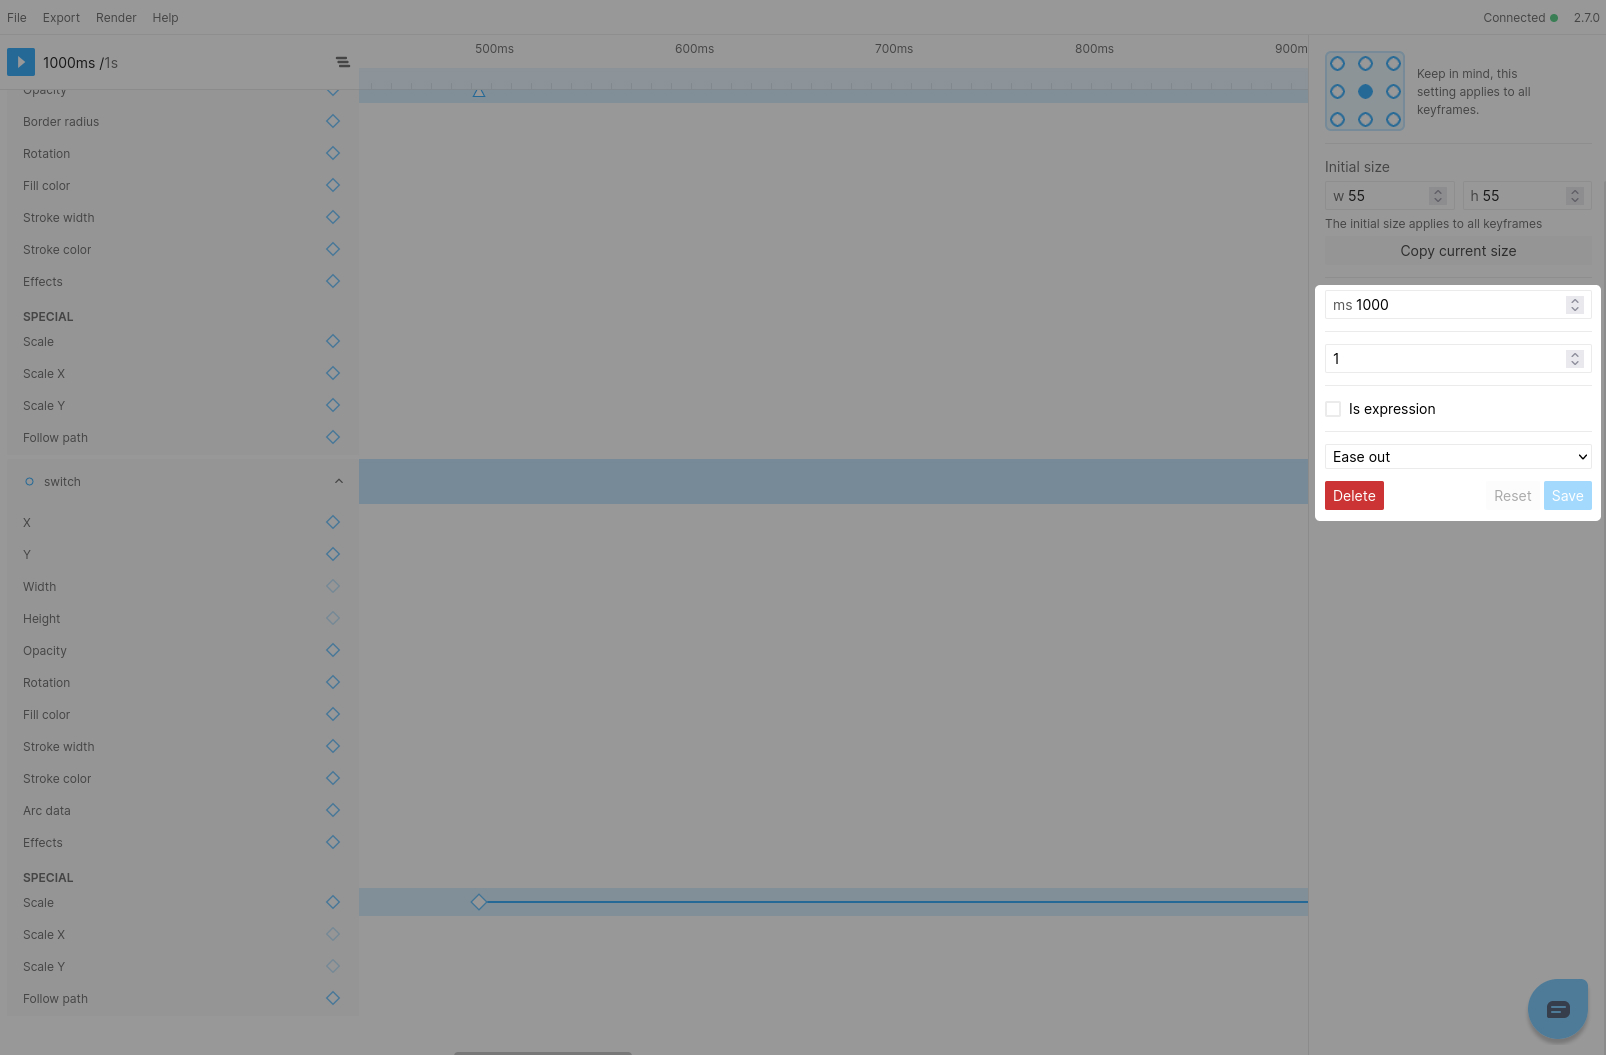
Ease out at 1000ms

When you play the animation now, you'll realize that it stops at 500ms. This happens due to our animation's Out point. which was set automatically to the time of the initial keyframe we added. To address this and cover the complete animation up until this point, you have two options. You can either drag the Out point to the desired time, or you can use the CTRL/CMD+M shortcut to reset it to the end of the animation.

Note Although it may appear unusual, the notion of In and Out points can be quite advantageous. They allow you to examine different sections of your animation by playing or rendering specific parts.

With this all done, you will now see the following animation:

Scaled in switch

Step 5: Turning it on

To complete our switch animation, we will now animate it from left to right, indicating that the switch has been turned on. However, we only want this to happen after the switch has fully appeared. Therefore, we will begin by adding a keyframe at 1000ms for the x property, which will serve as our initial value. After that, we will add another keyframe at 1500ms for the x property, which is when we want our animation to be complete.

Note since we are once again extending our animation, we will reset our out-point by hitting CTRL/CMD+M
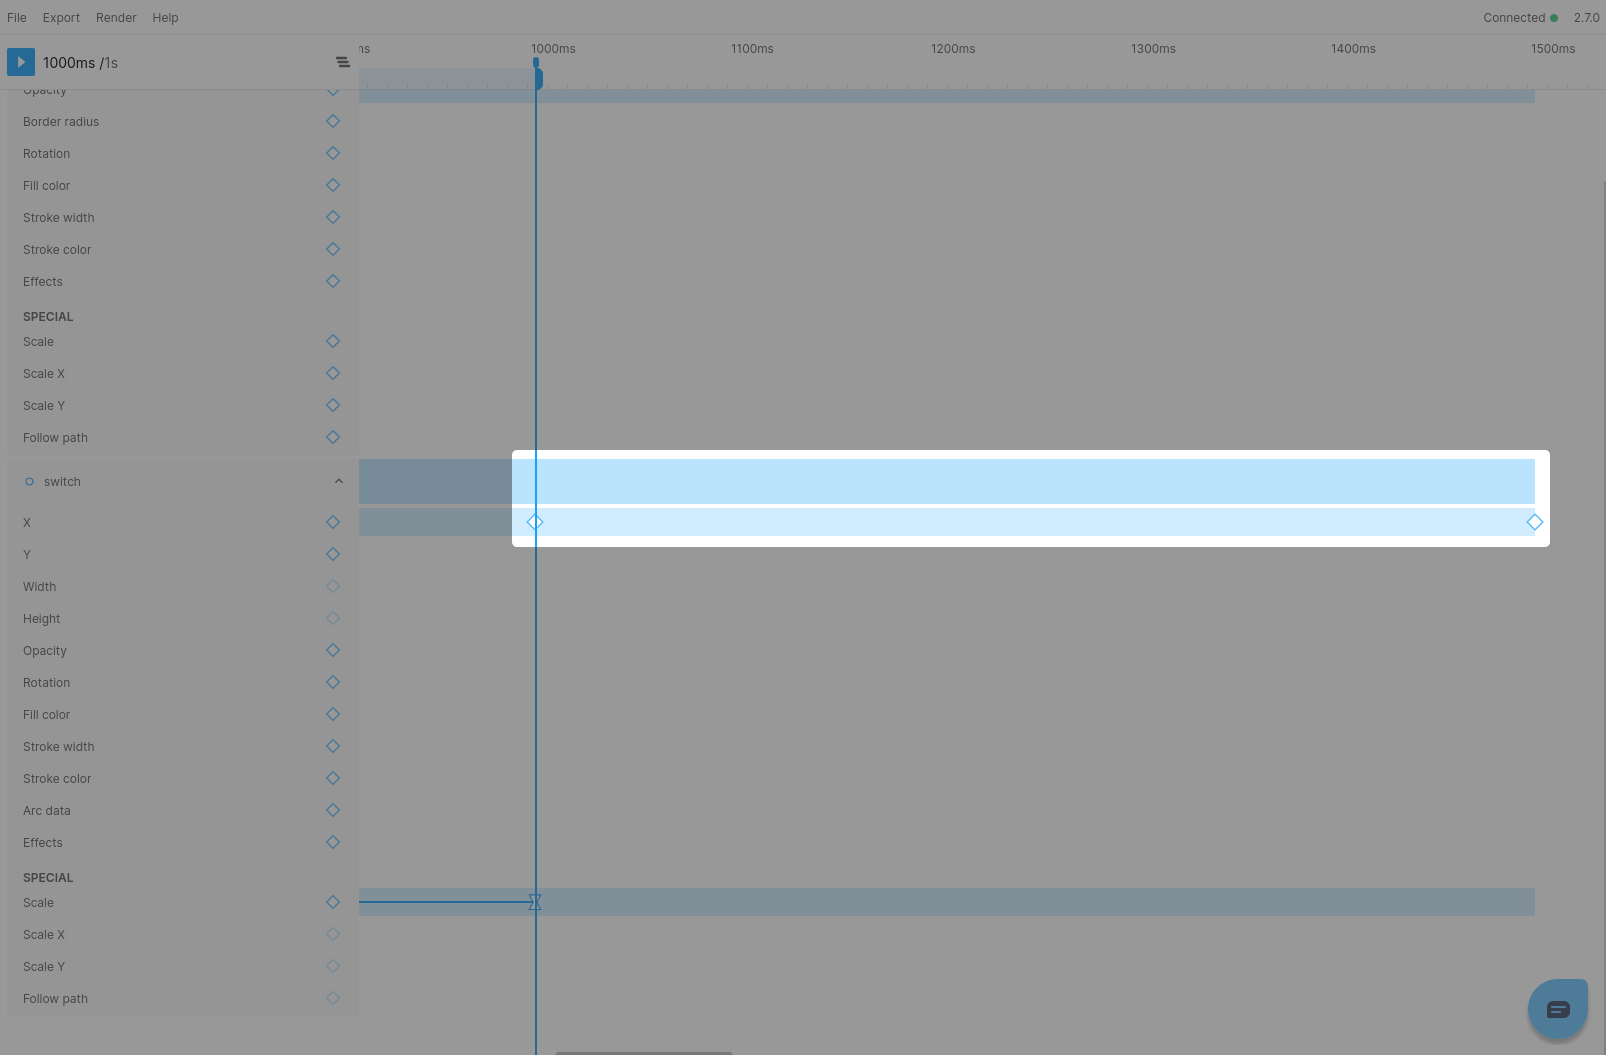
Adding x keyframes

Now let's select our final keyfame and update it's value. We can enter the value manually, but to make this easier we can simply move the switch in Figma and hit the "Copy current value from Figma" button. This will simply copy the value from your Figma design and insert it into the keyframe editor.

Lastly we will also update the easing curve. For this final keyframe, we will set the easing to custom and adjust the curve manually.
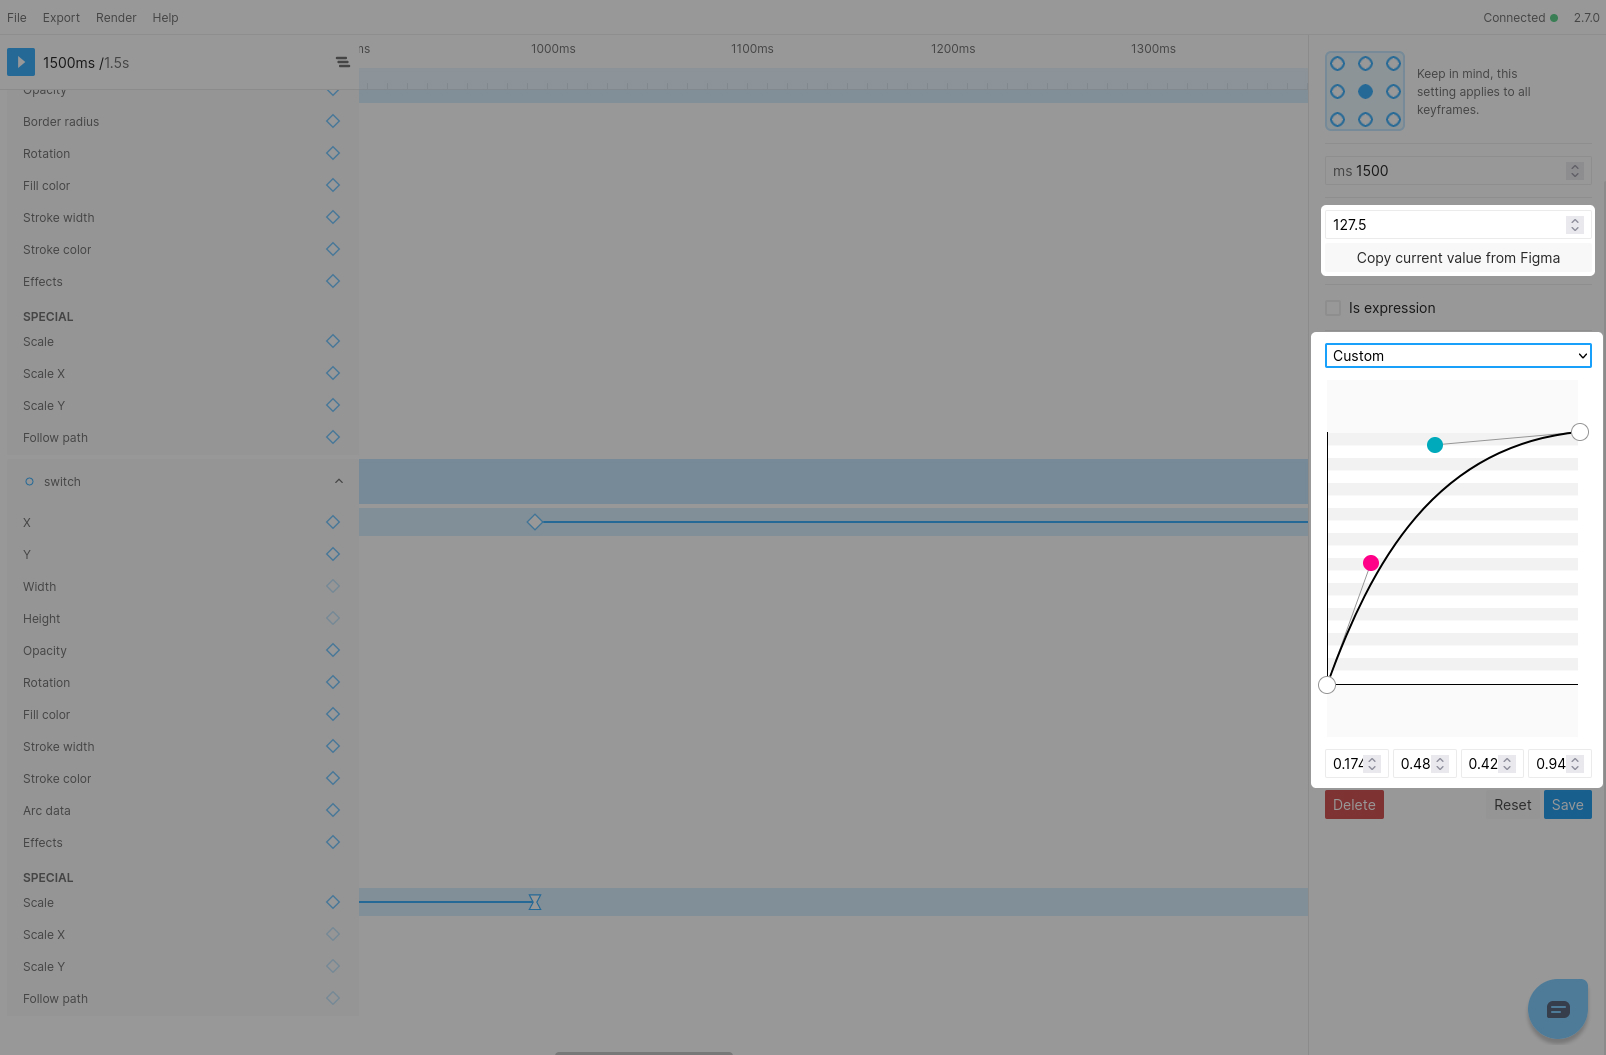
Copy value and easing

Once we hit Save, we will see our final animation:

Final animation

Adding the animation to our React code

Step 1: Export the animation

To integrate the animation we just created into React we will export the animation for framer-motion. Simply select the Export menu item and export and save the motion.tsx file to your device. ("Framer Motion" should be selected by default in the export dialog, but you may need to select the option manually)
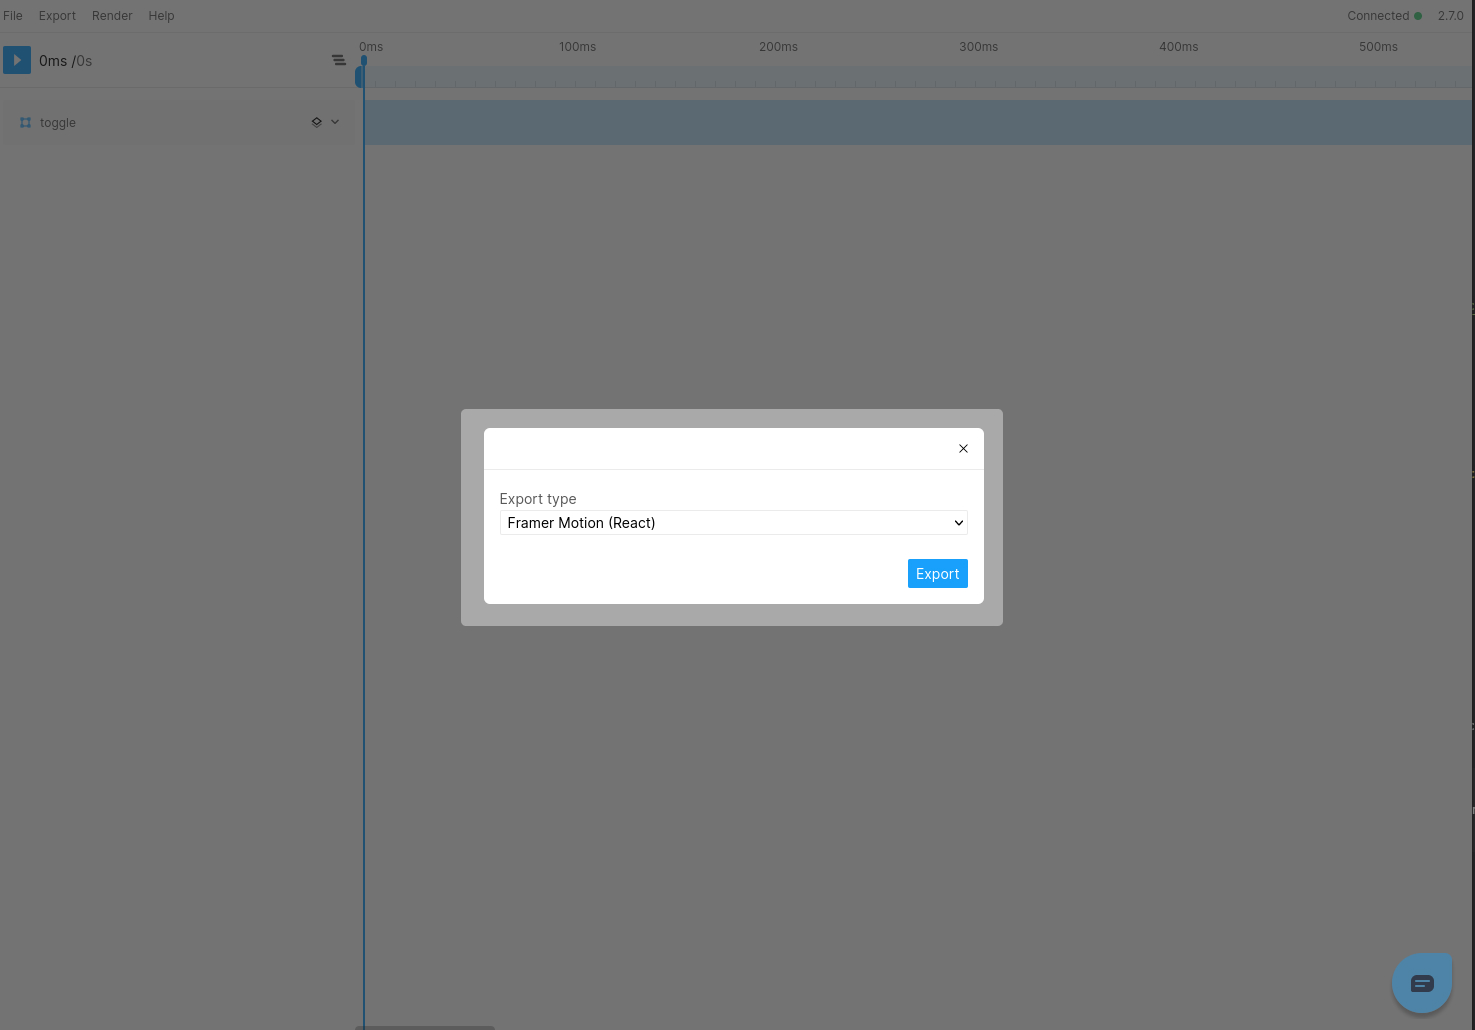
Export

Step 2: Set-up our code

The actual design of the switch will need to implemented manually. I have already set-this up in a Codesandbox which you can use as a starting point

Step 3: Add the animations

Now comes to exciting part, adding the animations we just exported. To do this, we will create a file named motion.ts in our src directory and copy the animations variable that we exported from the motion.tsx file.

The final result will resemble something like this.

import { TargetAndTransition } from "framer-motion";

export const animations: Record<string, TargetAndTransition> = {
_1_3_toggle: {
opacity: [0, 1],
transition: {
opacity: {
type: "keyframes",
ease: [0, 0, 0.58, 1],
times: [0, 1],
duration: 0.5
}
}
},
_1_4_switch: {
scale: [0, 0, 1],
transition: {
scale: {
type: "keyframes",
ease: [
[0, 0, 1, 1],
[0, 0, 0.58, 1]
],
times: [0, 0.5, 1],
duration: 1
},
x: {
type: "keyframes",
ease: [
[0, 0, 1, 1],
[0.174, 0.482, 0.427, 0.949]
],
times: [0, 0.6666666666666666, 1],
duration: 1.5
}
},
x: [null, 0, 88]
}
};

You will observe that the animations object has two keys, with each key corresponding to one of our Figma layers. Each key includes all the keyframe and timing information necessary for our animation. Now, all we have to do is connect the keyframes to our elements.

To complete our animation, we will navigate to the App.tsx file. Here, we will import the motion.ts file and then apply the corresponding animation keyframes to each motion.div element.

The resulting file will resemble something like this:

import "./styles.css";
import { motion } from "framer-motion";
import { createUseStyles } from "react-jss";
import { animations } from "./motion";

const useStyles = createUseStyles({
// ...existing styles
});

export default function App() {
const styles = useStyles();

return (
<div className={styles.container}>
<motion.div animate={animations._1_3_toggle} className={styles.toggle}>
<motion.div
animate={animations._1_4_switch}
className={styles.switch}
/>
</motion.div>
</div>
);
}

You can also check out the final result in the CodeSandbox below

· 2 min read
Liam Martens

With Figmotion Standalone 2.3.0 it is now possible to create complex movements using the Follow path property. This short guide will explain how to use it.

Step 1: Setup the frame

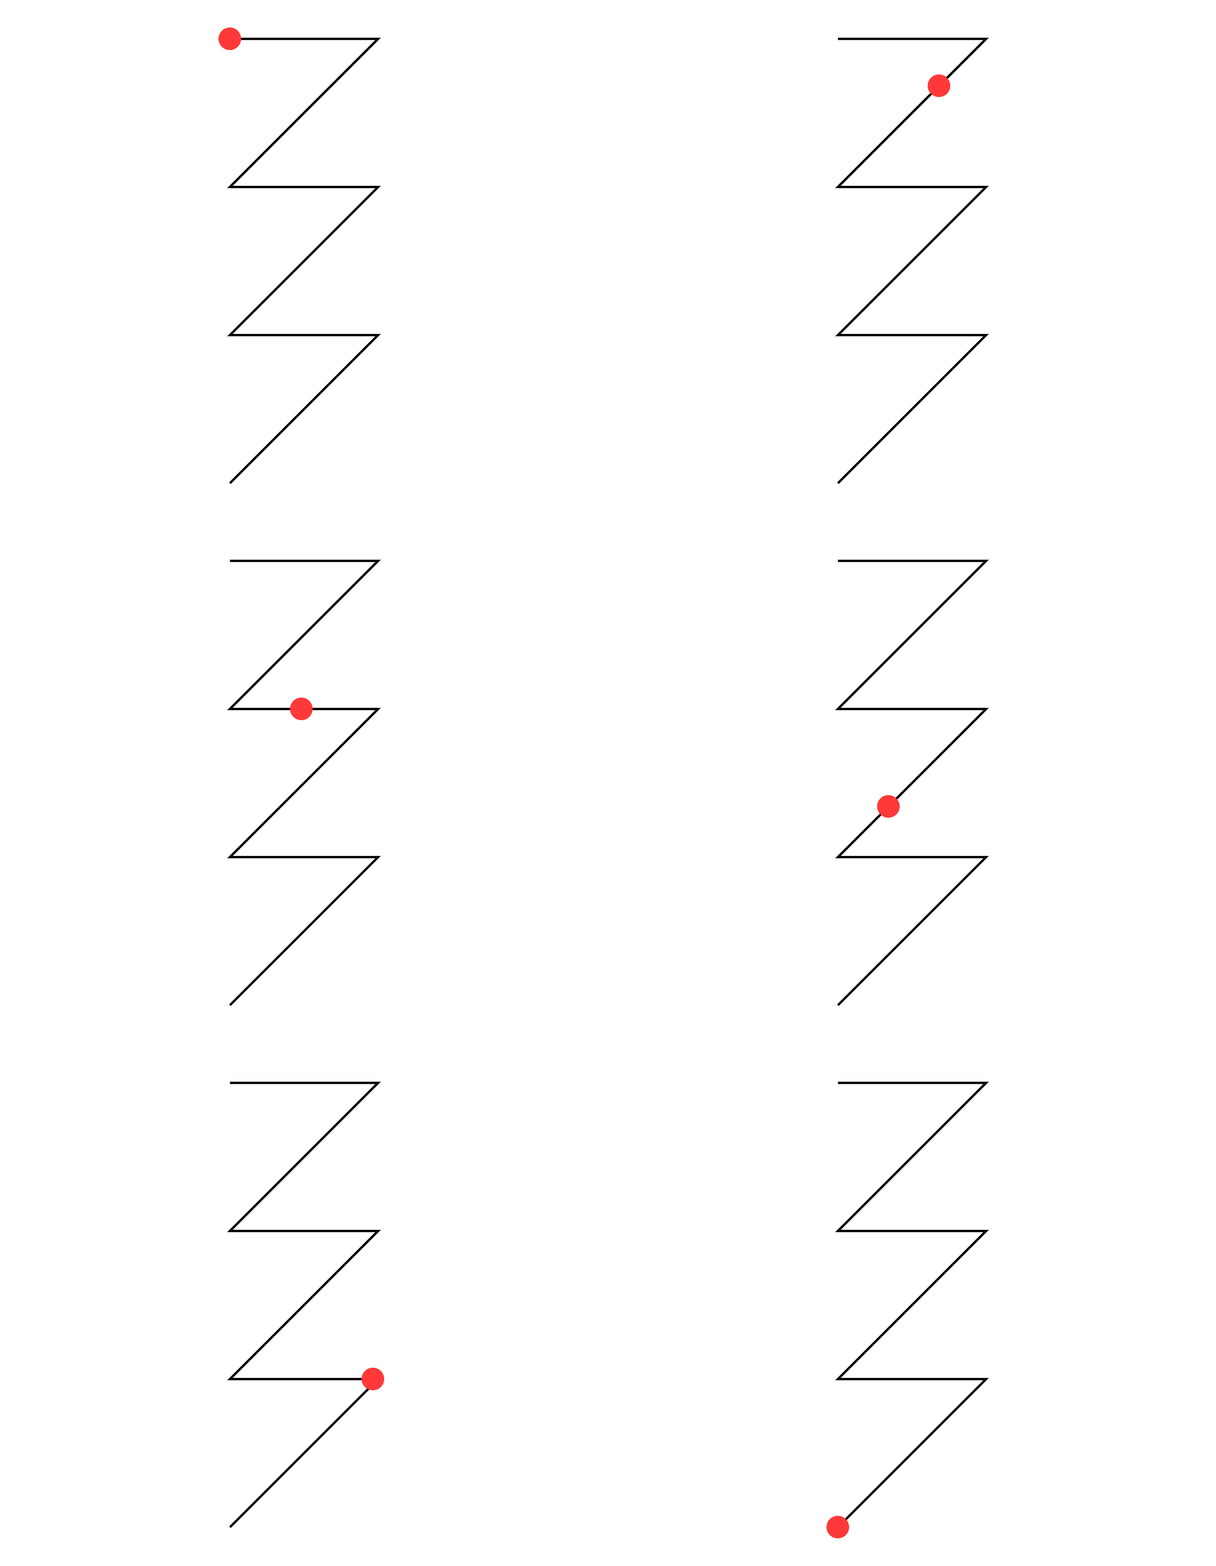
We will start by defining the path we want our layer to follow. For this example we will just be creating a zig-zag pattern.

Setup path

We will also create the layer we want to animate. This will just be a small red dot for our example.

Red dot

Step 2: Add the follow path property

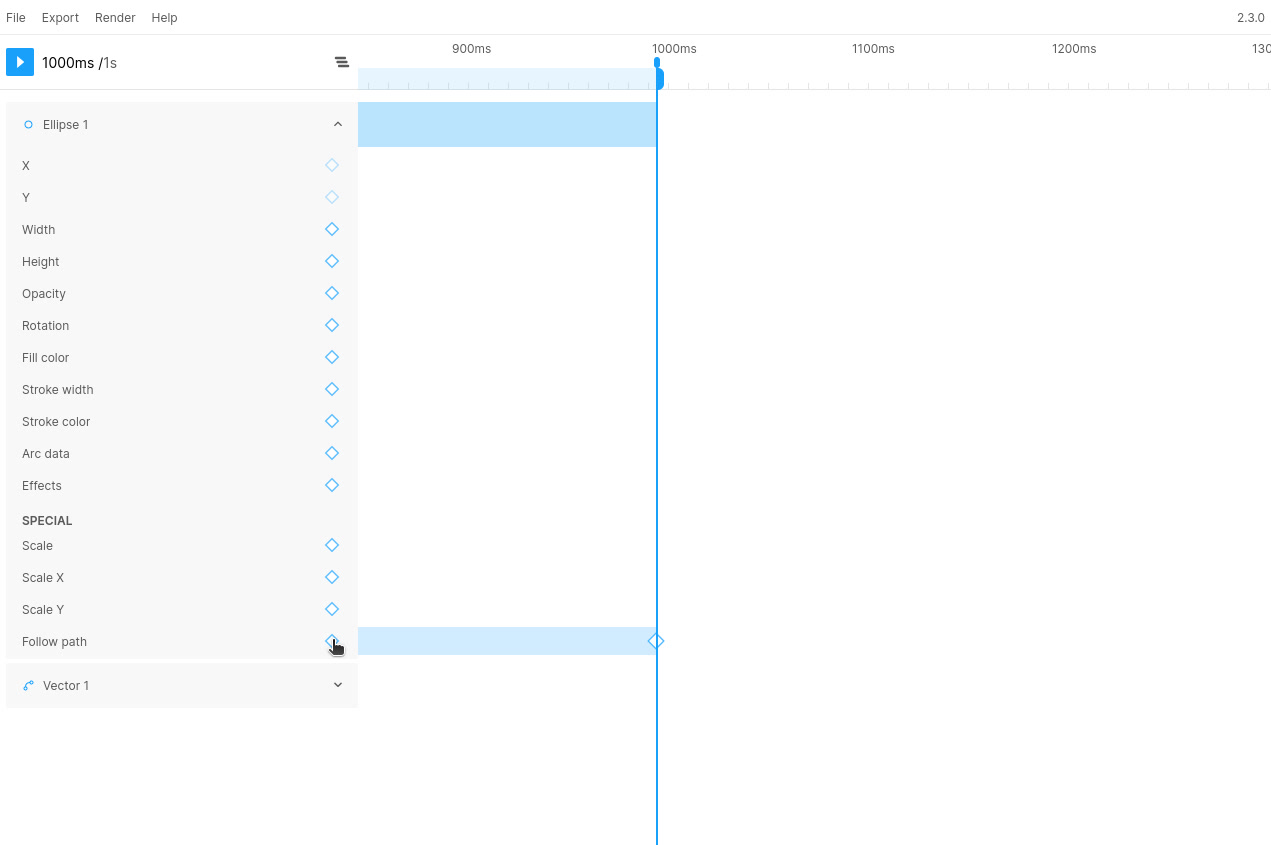
Next we will open Figmotion and add a keyframe for our follow path property. We will add the keyframe at the 1000ms mark to make the animation 1s long.

Add keyframe

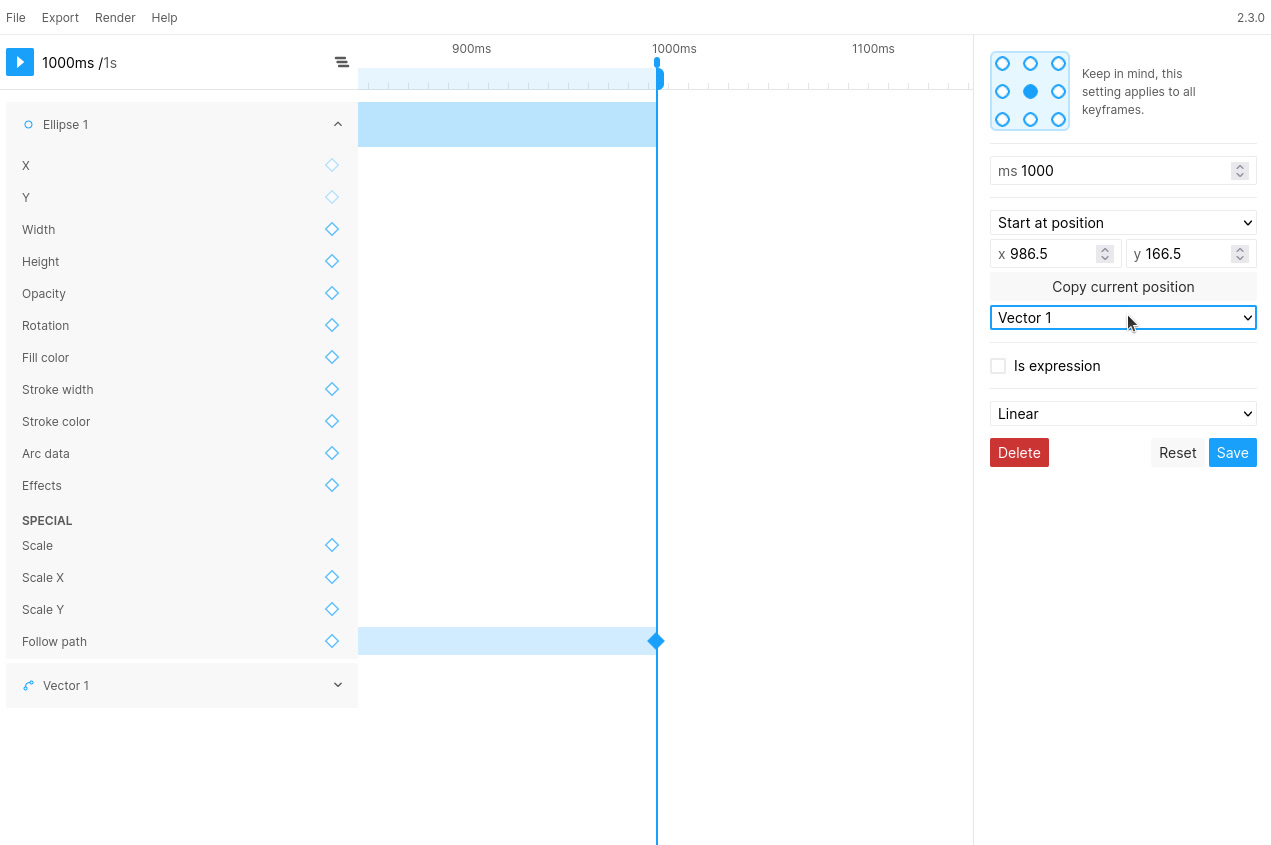
Figmotion won't know which path to follow yet so we will have to open the keyframe panel, by selecting the newly added keyframe, and select the vector layer we want to follow in the dropdown.

Note At this time, only Vector layers can be targeted with the follow path property

Selecting the layer

Once selected we can hit Save

If we play the animation now, we will see our layer following the path nicely 🎉

First result

(Optional) Step 3: Hiding the path and changing the positioning
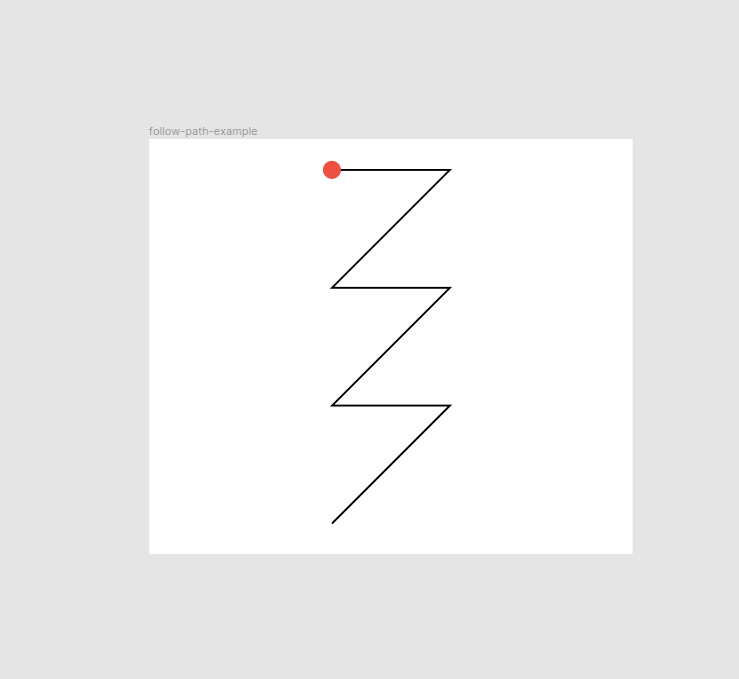
Of course we don't want our reference path to just be visible in the final design, so we can go ahead and simply hide it. This will not impact our animation in any way.

Lastly, we may want our layer to follow the same path, but start in a different location. This is where the "Start at position" setting comes in. This defines the start position of your follow keyframe. To change this you can simply move your layer to the desired starting position and hit "Copy current position" or you can manually update the coordinates. (keep in mind these coordinates are relative to the anchor point whereas the coordinates shown within Figma are always based on the top-left position). This way we can have our layer start in the top left of our frame instead:

Final result

You can also change this setting to "End at position" which reverses the behavior so your layer will now end at your pre-defined position as opposed to starting there.

· 3 min read
Liam Martens

With the introduction of expressions in Figmotion (Advanced animations with expressions) it has now become super easy to create repetitive (yet complex) animations.

In this small guide we will be creating a floating heart animation with just a single expression keyframe.

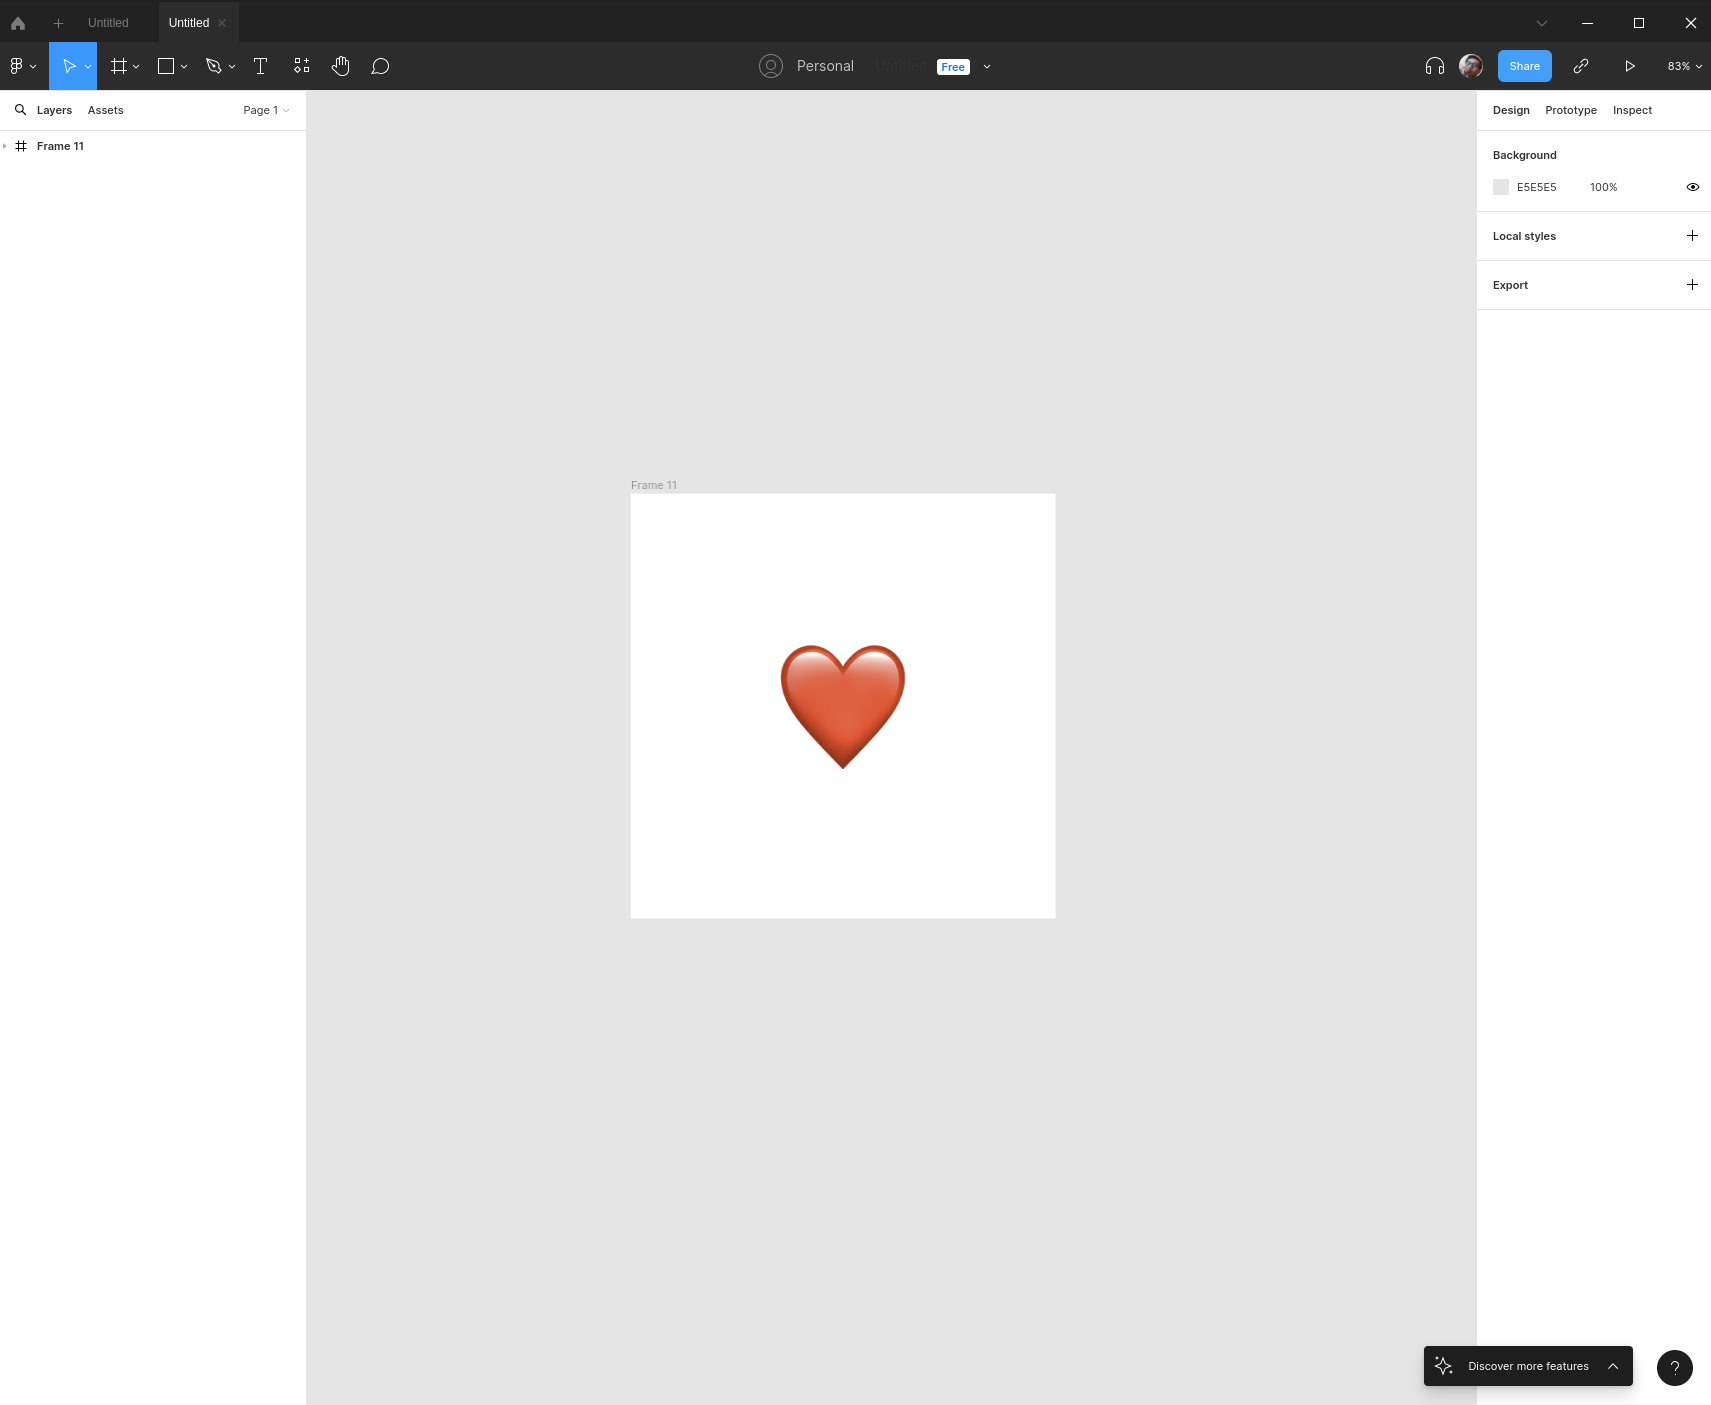
Step 1: Create the Frame

The design is very simple. We simply create a Frame and place an image in the middle of it. For this guide, I will be using an image representation of the heart emoji.

The design file

Step 2: Open and connect Figmotion

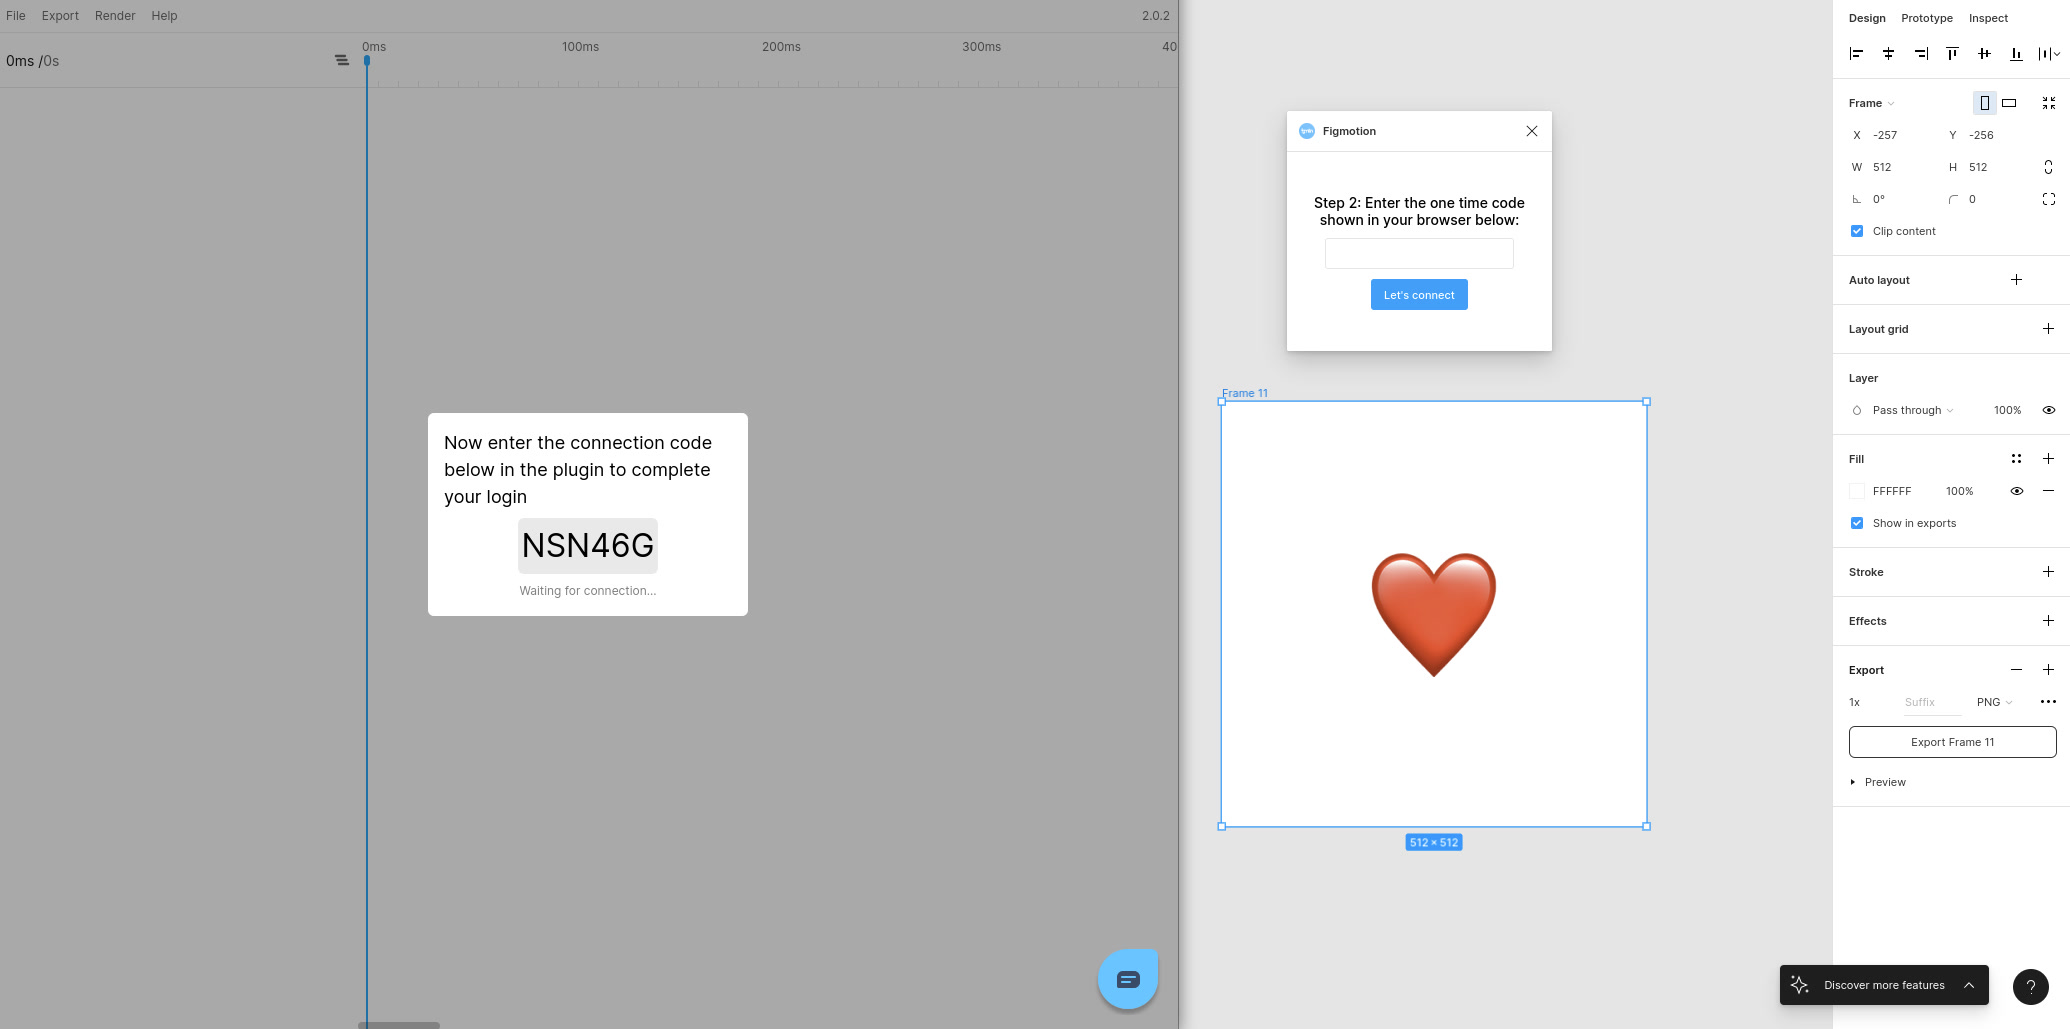
Let's open Figmotion and connect the standalone UI so we can start animating.

Connecting Figmotion

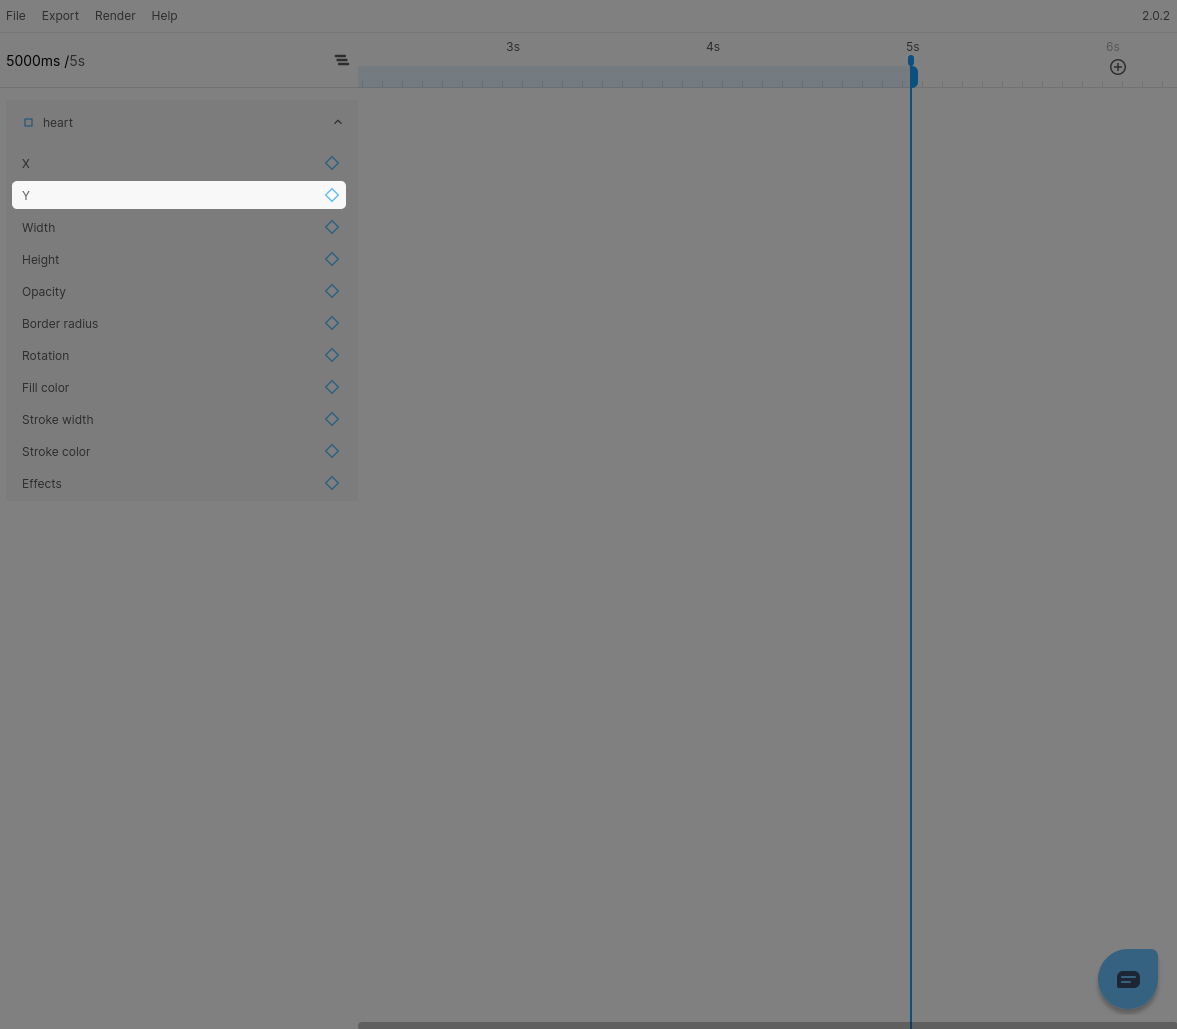
Step 3: Add a Y position keyframe

We will be creating a 5s animation, so let's zoom out and move our timehandle to the end of the default timeline at 5s. Next we can expand the image layer to display the available properties to animate. To add our keyframe we wil click the Add keyframe button next to the Y property.

Adding the keyrfame

Step 4: Change the keyframe to an expression

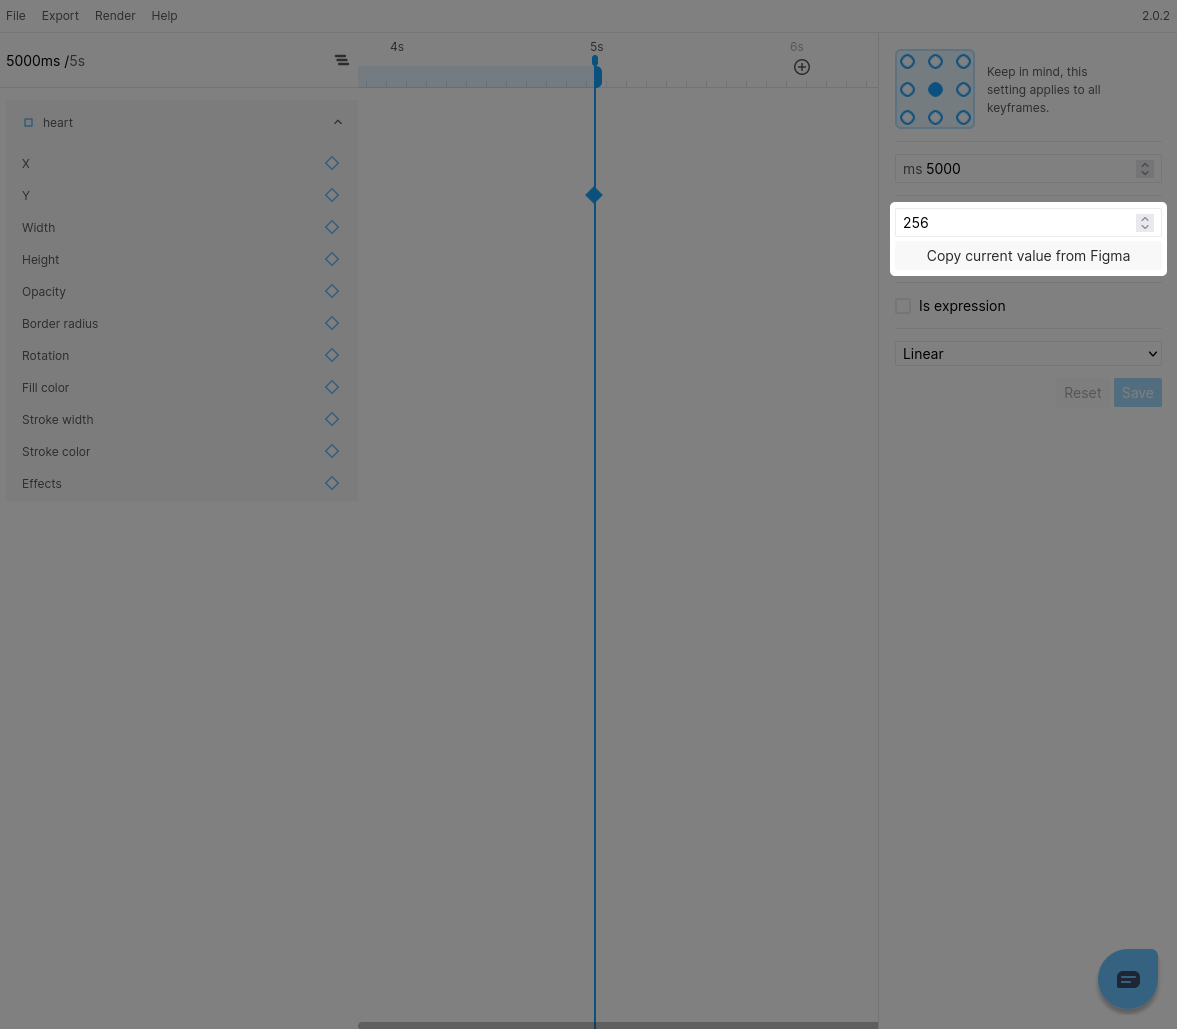
You can now select the keyframe we just created. Before you enable the Is expression checkbox, note down the current value of the Y position, we will need this to define the start position in our expression.

Note down current value

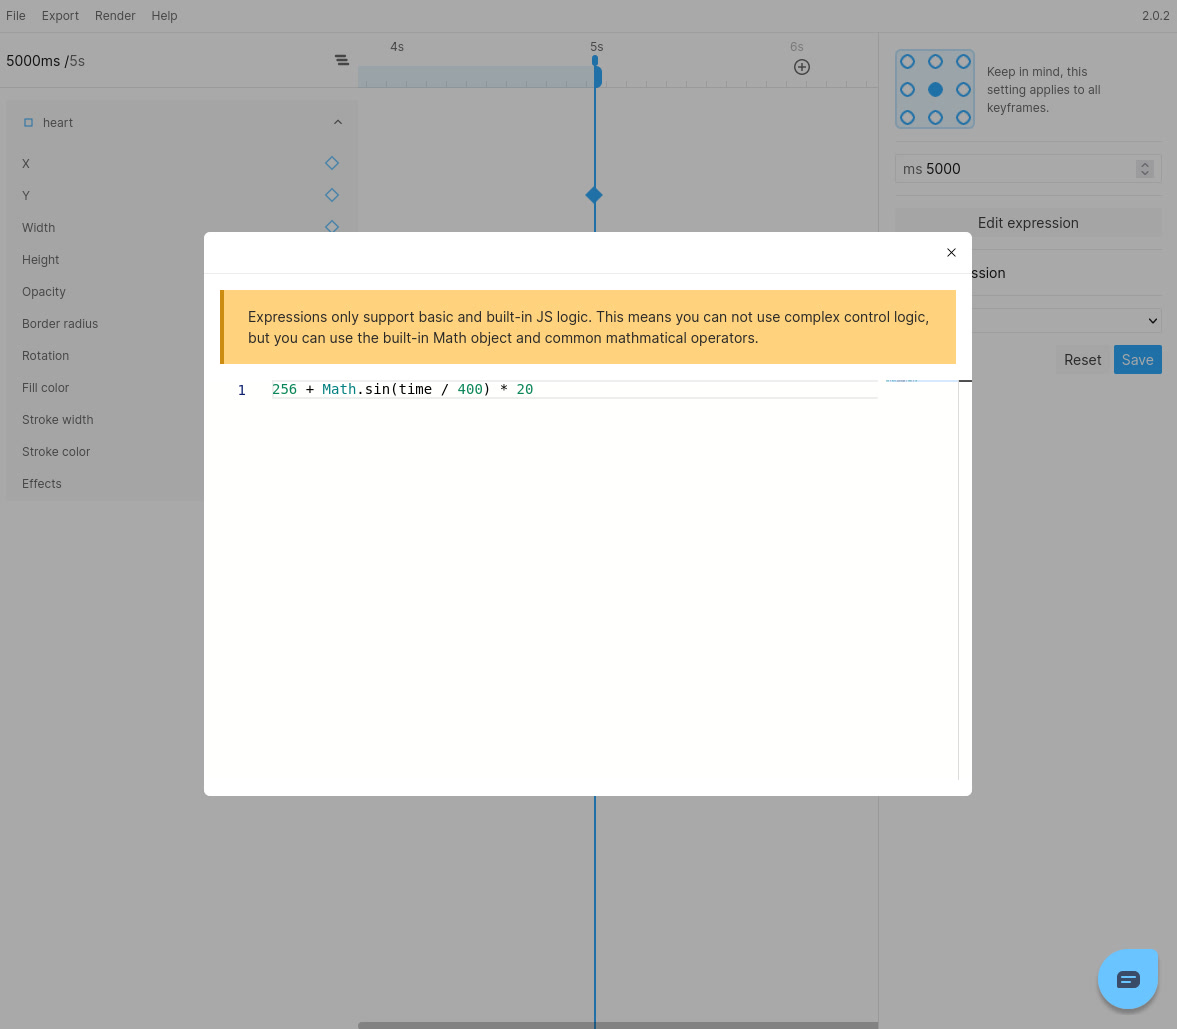
Once noted down, you can check the Is expression checkbox and subsequently click Edit expression. You will now see the expression editor and we can start writing our expression.

Step 5: Writing the actual expression

We want our heart to softly float up and down to create our animation. We can utilize a sine wave to easily and quickly create this behavior.

Sine wave visualization from Wikipedia

With this knowledge in mind we can create an expression like this: {Y_START_VALUE} + Math.sin(time / {DAMPENING_VALUE}) * {OSCILLATION_AMOUNT}

This won't work yet because we need to actually enter our parameters.

  • Y_START_VALUE will be the value we noted down earlier.
  • DAMPENING_VALUE is a number of your choosing to dampen the speed at which the iamge will oscillate. We will be using 400 in our example.
  • OSCILLATION_AMOUNT is the amount you want the image to actually move in either direction. We will be using 20 in our example.

The final expression will look like this 256 + Math.sin(time / 400) * 20

The final expression

That's it!

And that's it, our basic animation is now done:

The aninmation

This is just a basic example and expressions can do so much more. We are definitely excited to see this powerful feature become part of your work and feel free to Tweet us your animations @figmotionapp.